SWS3004-Lab Exercise 1
This Lab is based on Amazon Web Services(AWS),including EC2, Lambda, SQS and CloudWatch.
Exercise 1.1
Passwordless SSH access between two EC2 instances
Create two (2) AWS EC2 instances (virtual machines) with a Linux-based operating system(e.g., Ubuntu) and set up passwordless SSH access among them. Let’s suppose we name those 2 instances A and B. Passwordless SSH means that we can SSH into instance A from instance B and vice versa without being asked for a password. How do you do that? Please explain it in 1-2 paragraphs. [3 marks]
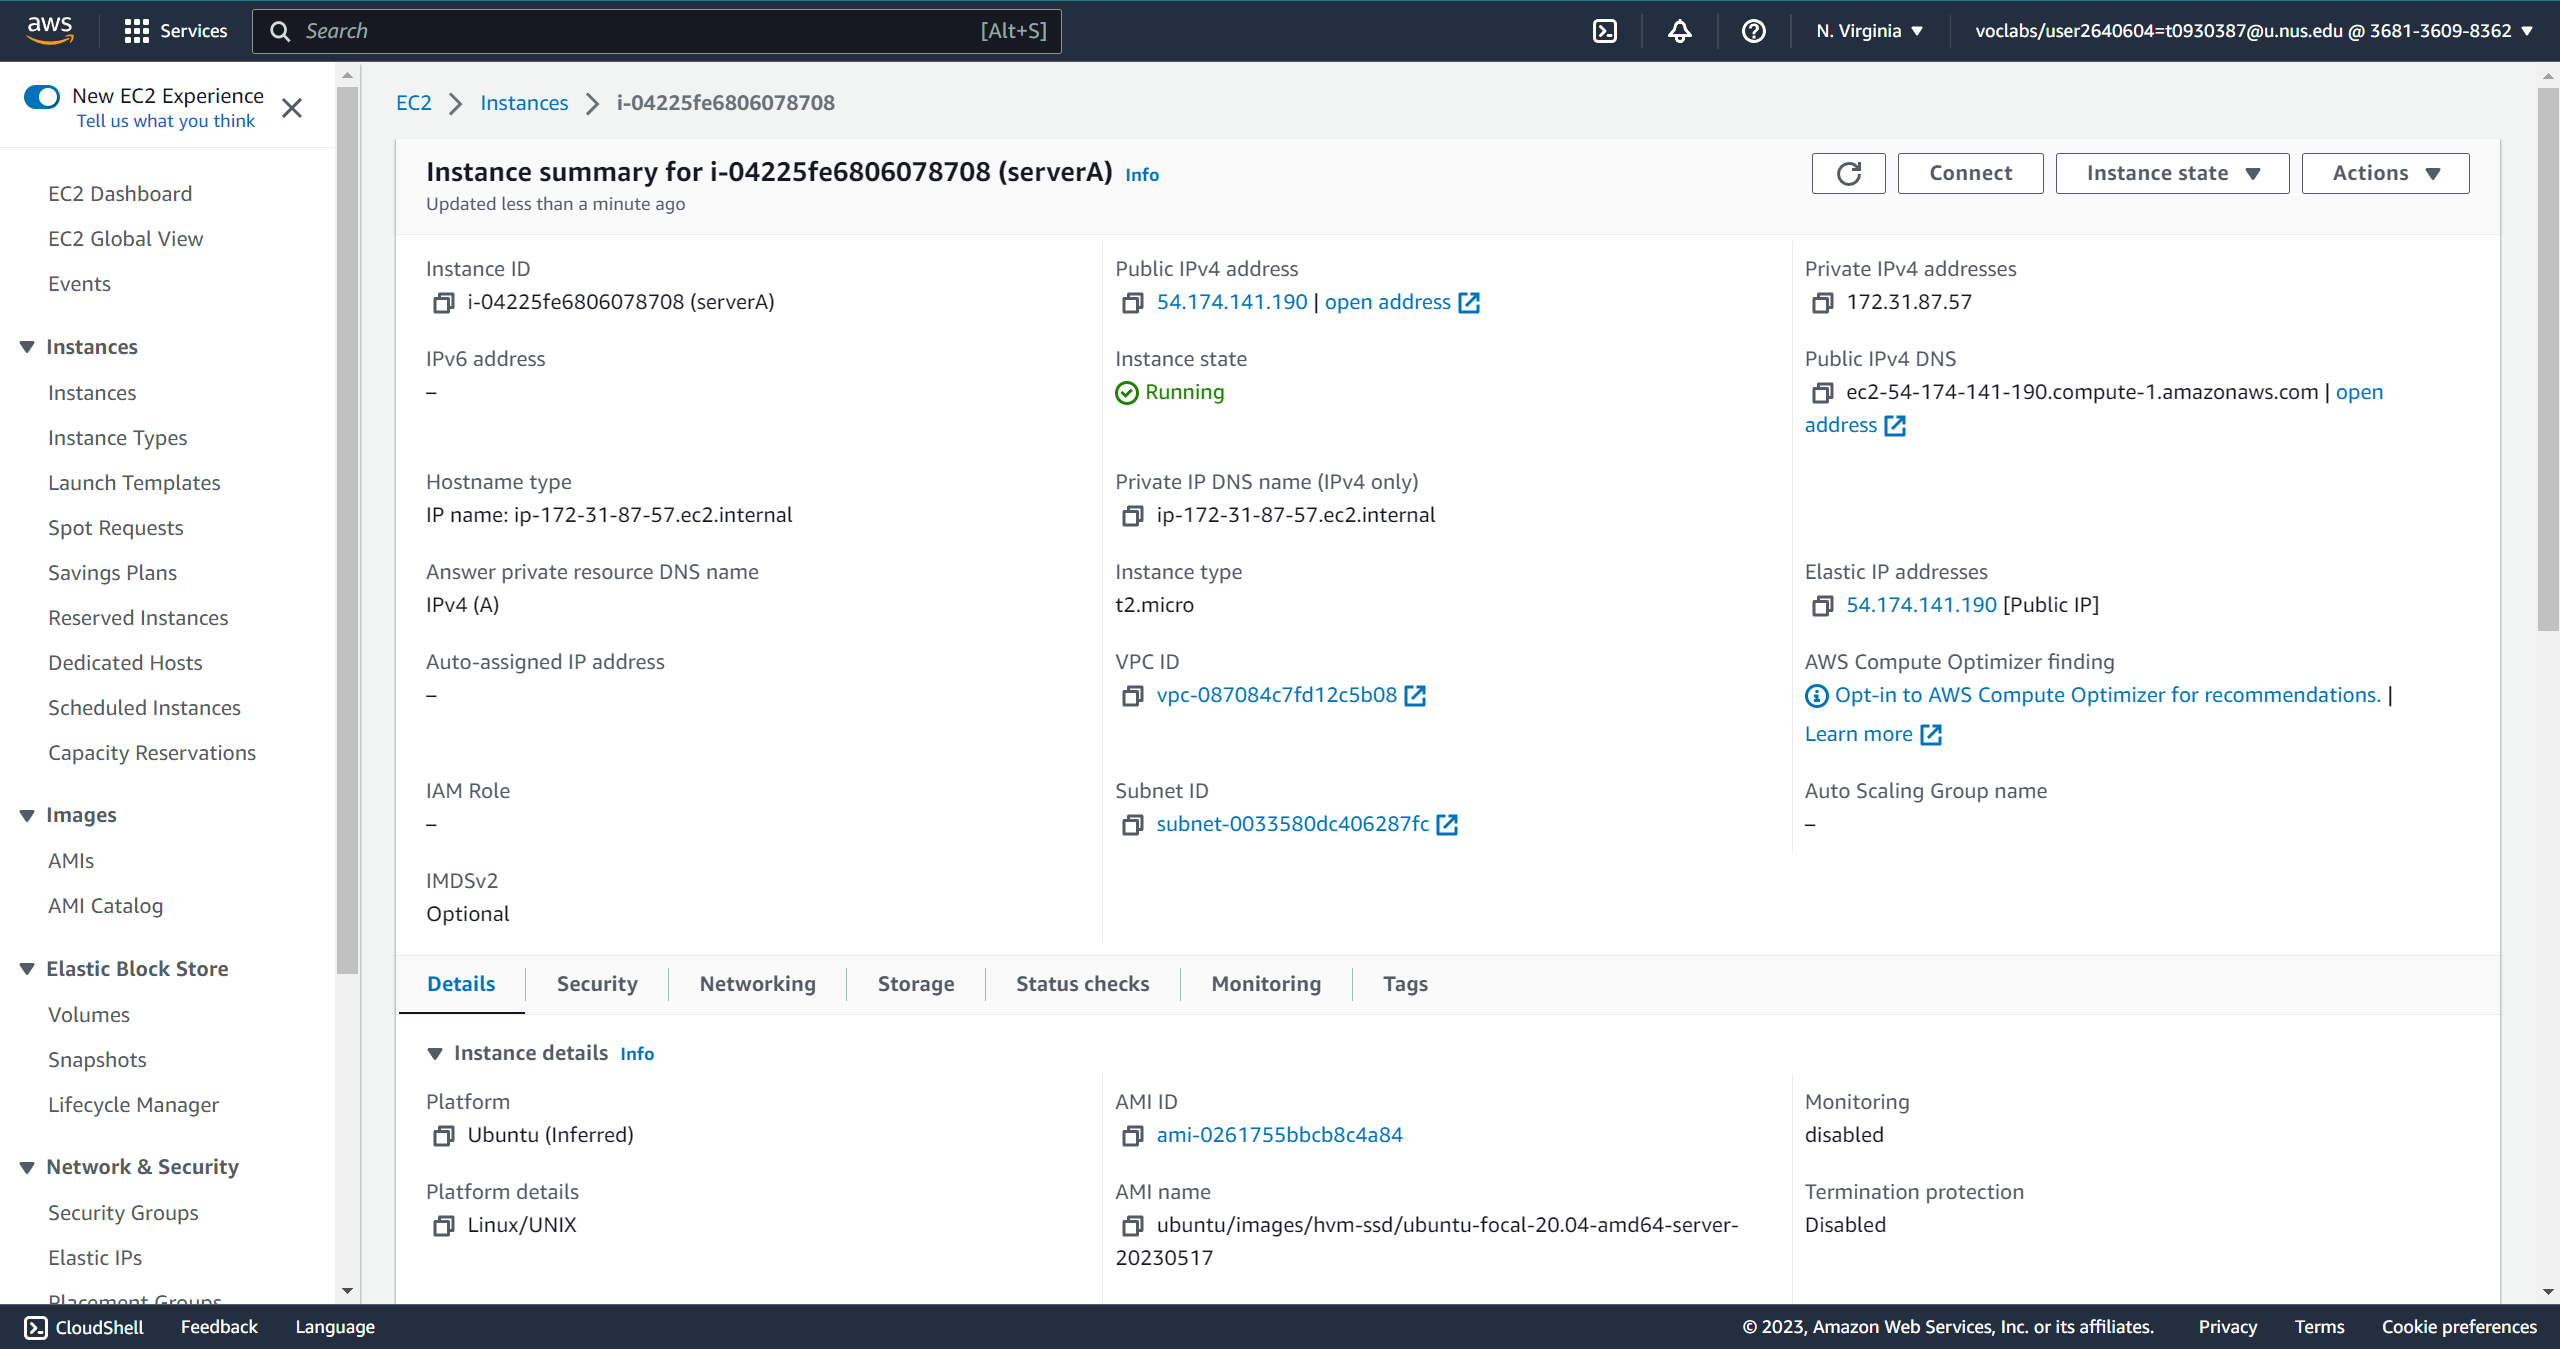
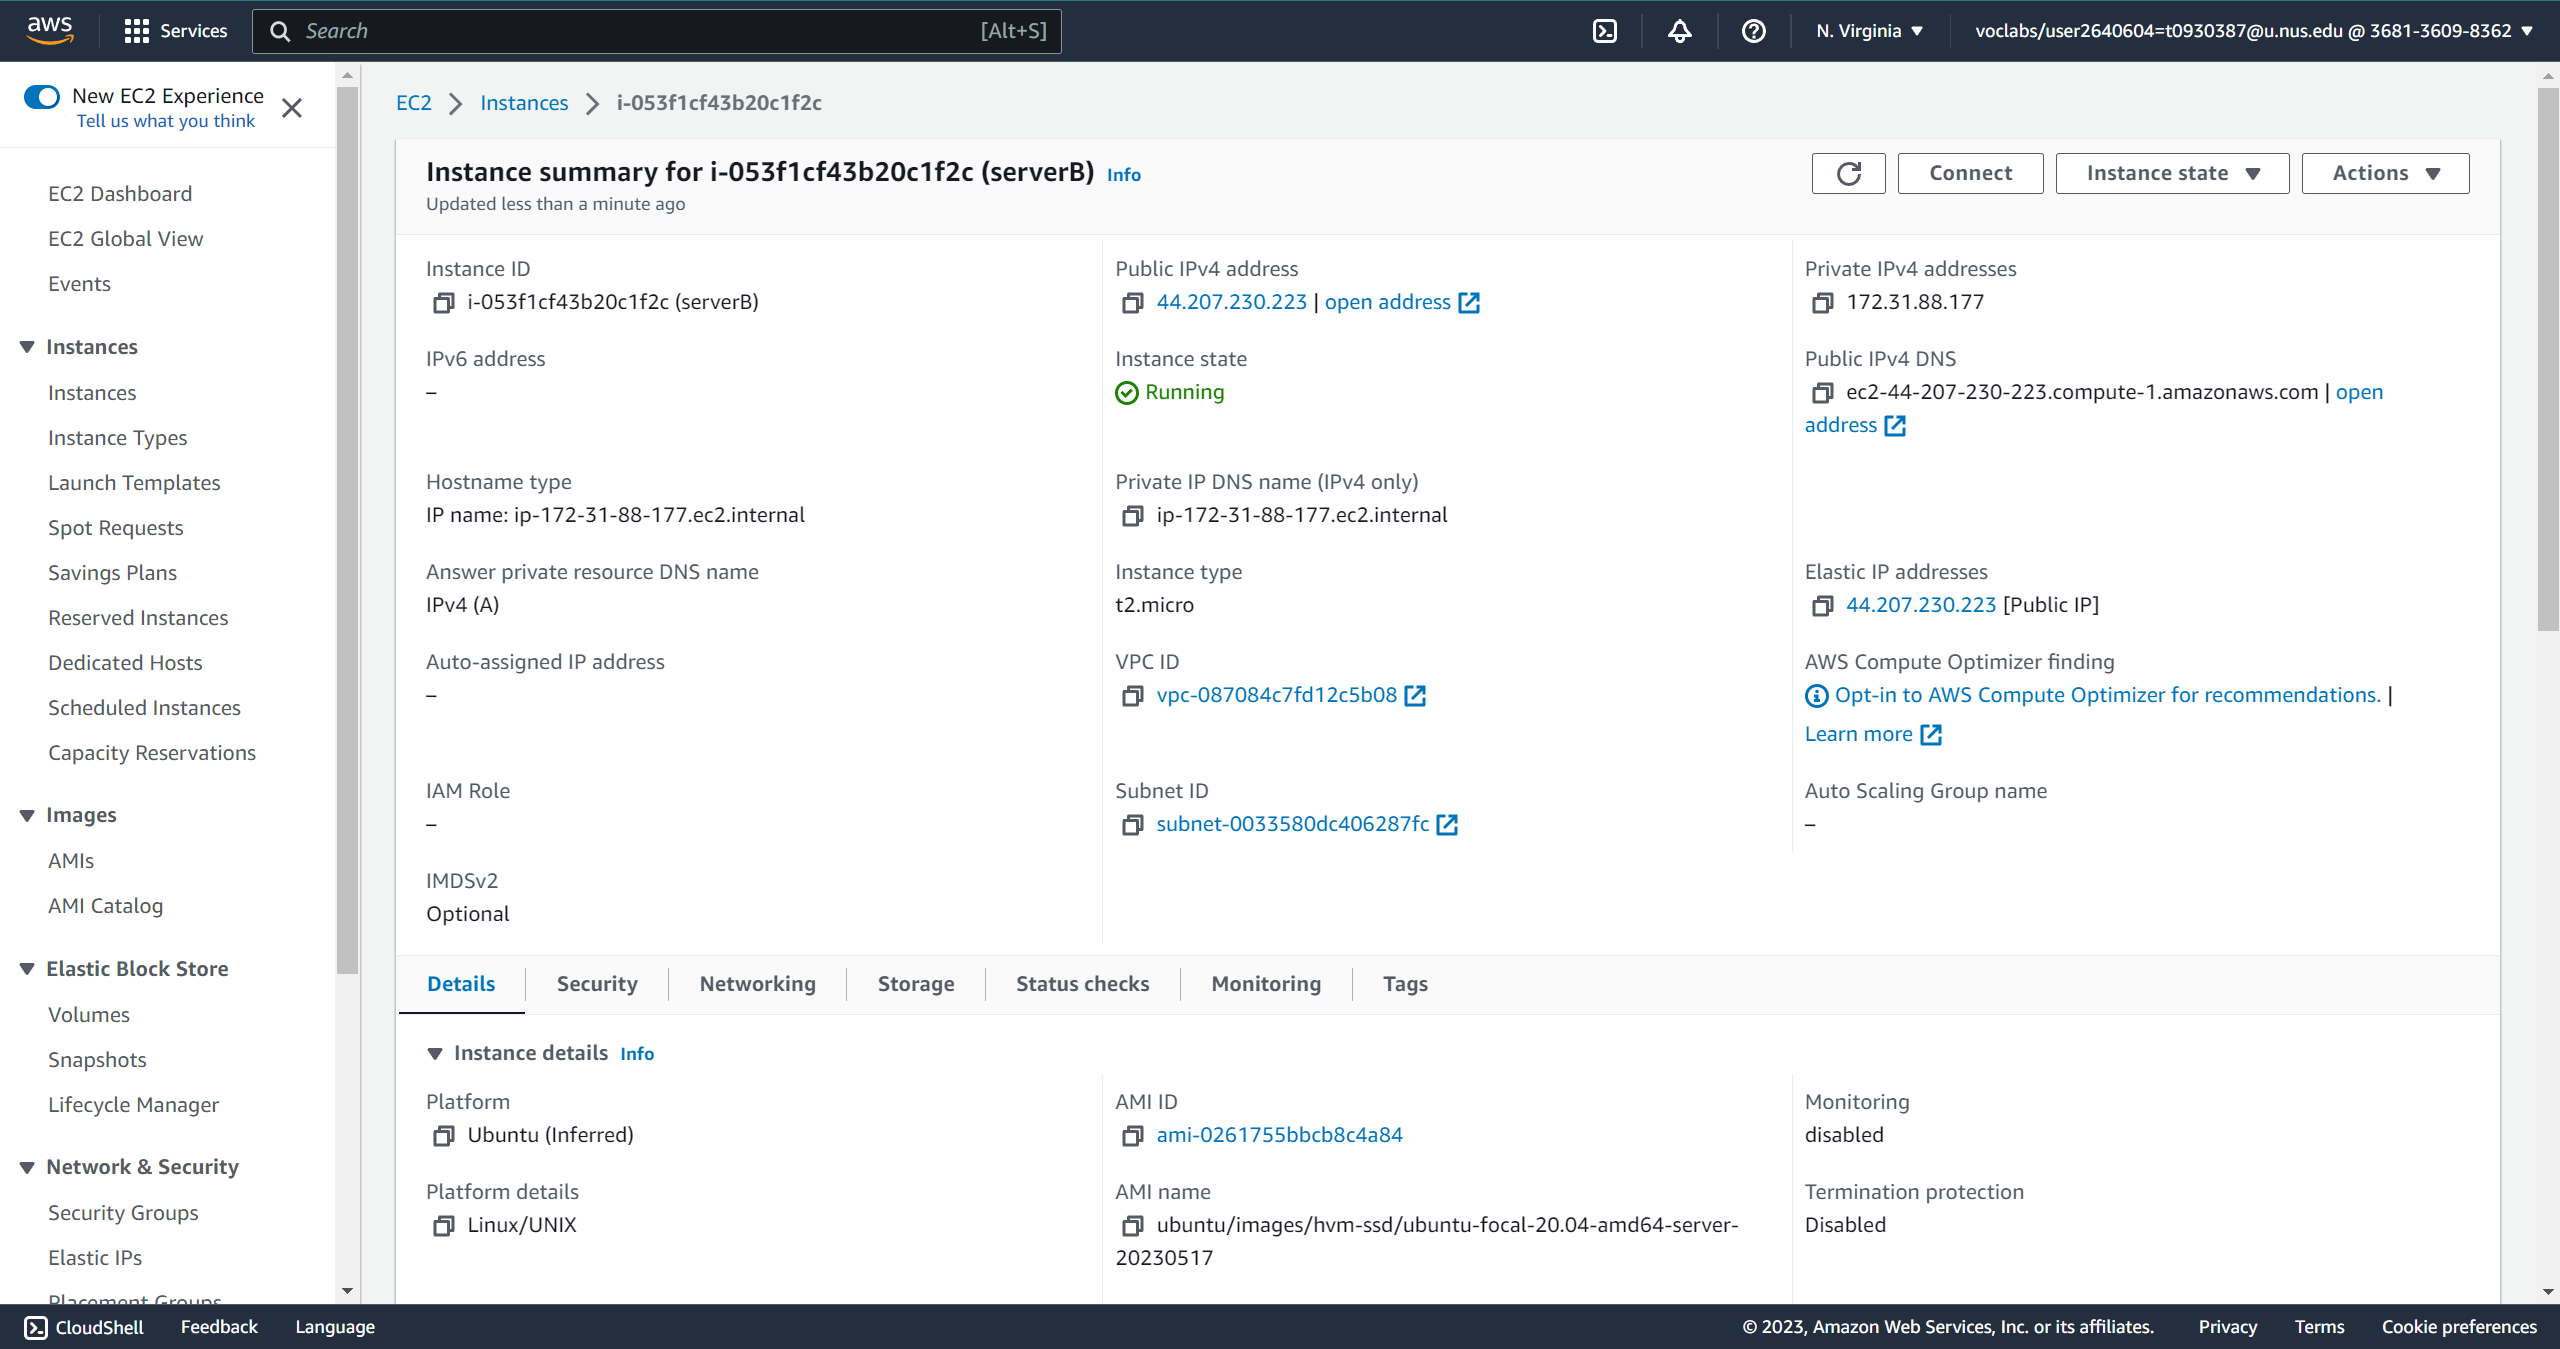
Firstly, I create two EC2 instances(serverA and serverB) with a Ubuntu-20.04 OS. The details are shown in Figure 1 and Figure 2 below. The IPv4 of serverA is 54.174.141.190, and the IPv4 of server B is 44.207.230.223.
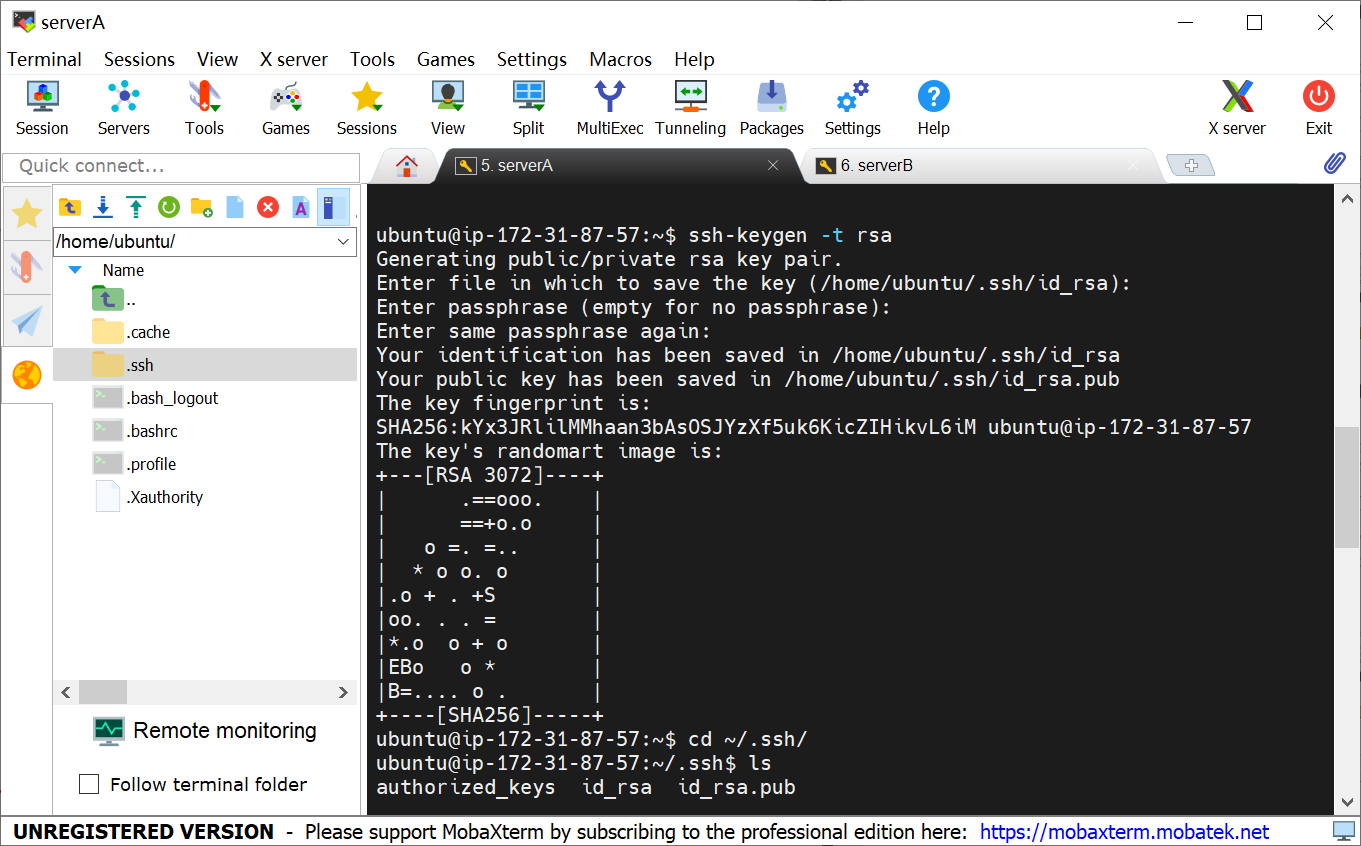
Let's start with password-less access from A to B. First, type the
command ssh-keygen -t rsa in instance A. This command will
generate a pair of public/private keys in the
~/.ssh/id_rsa.pub and ~/.ssh/id_rsa, shown in
Figure 3.
I met a trouble here: I use command
ssh-copy-id -i ~/.ssh/id_rsa.pub ubuntu@44.207.230.223 to
copy the public key of A to the authorized_keys of B, but
it shows Permission denied. The reason for this error is this command
will overwrite the file authorized_keys of B, but this file
is already exists so this command was denied.
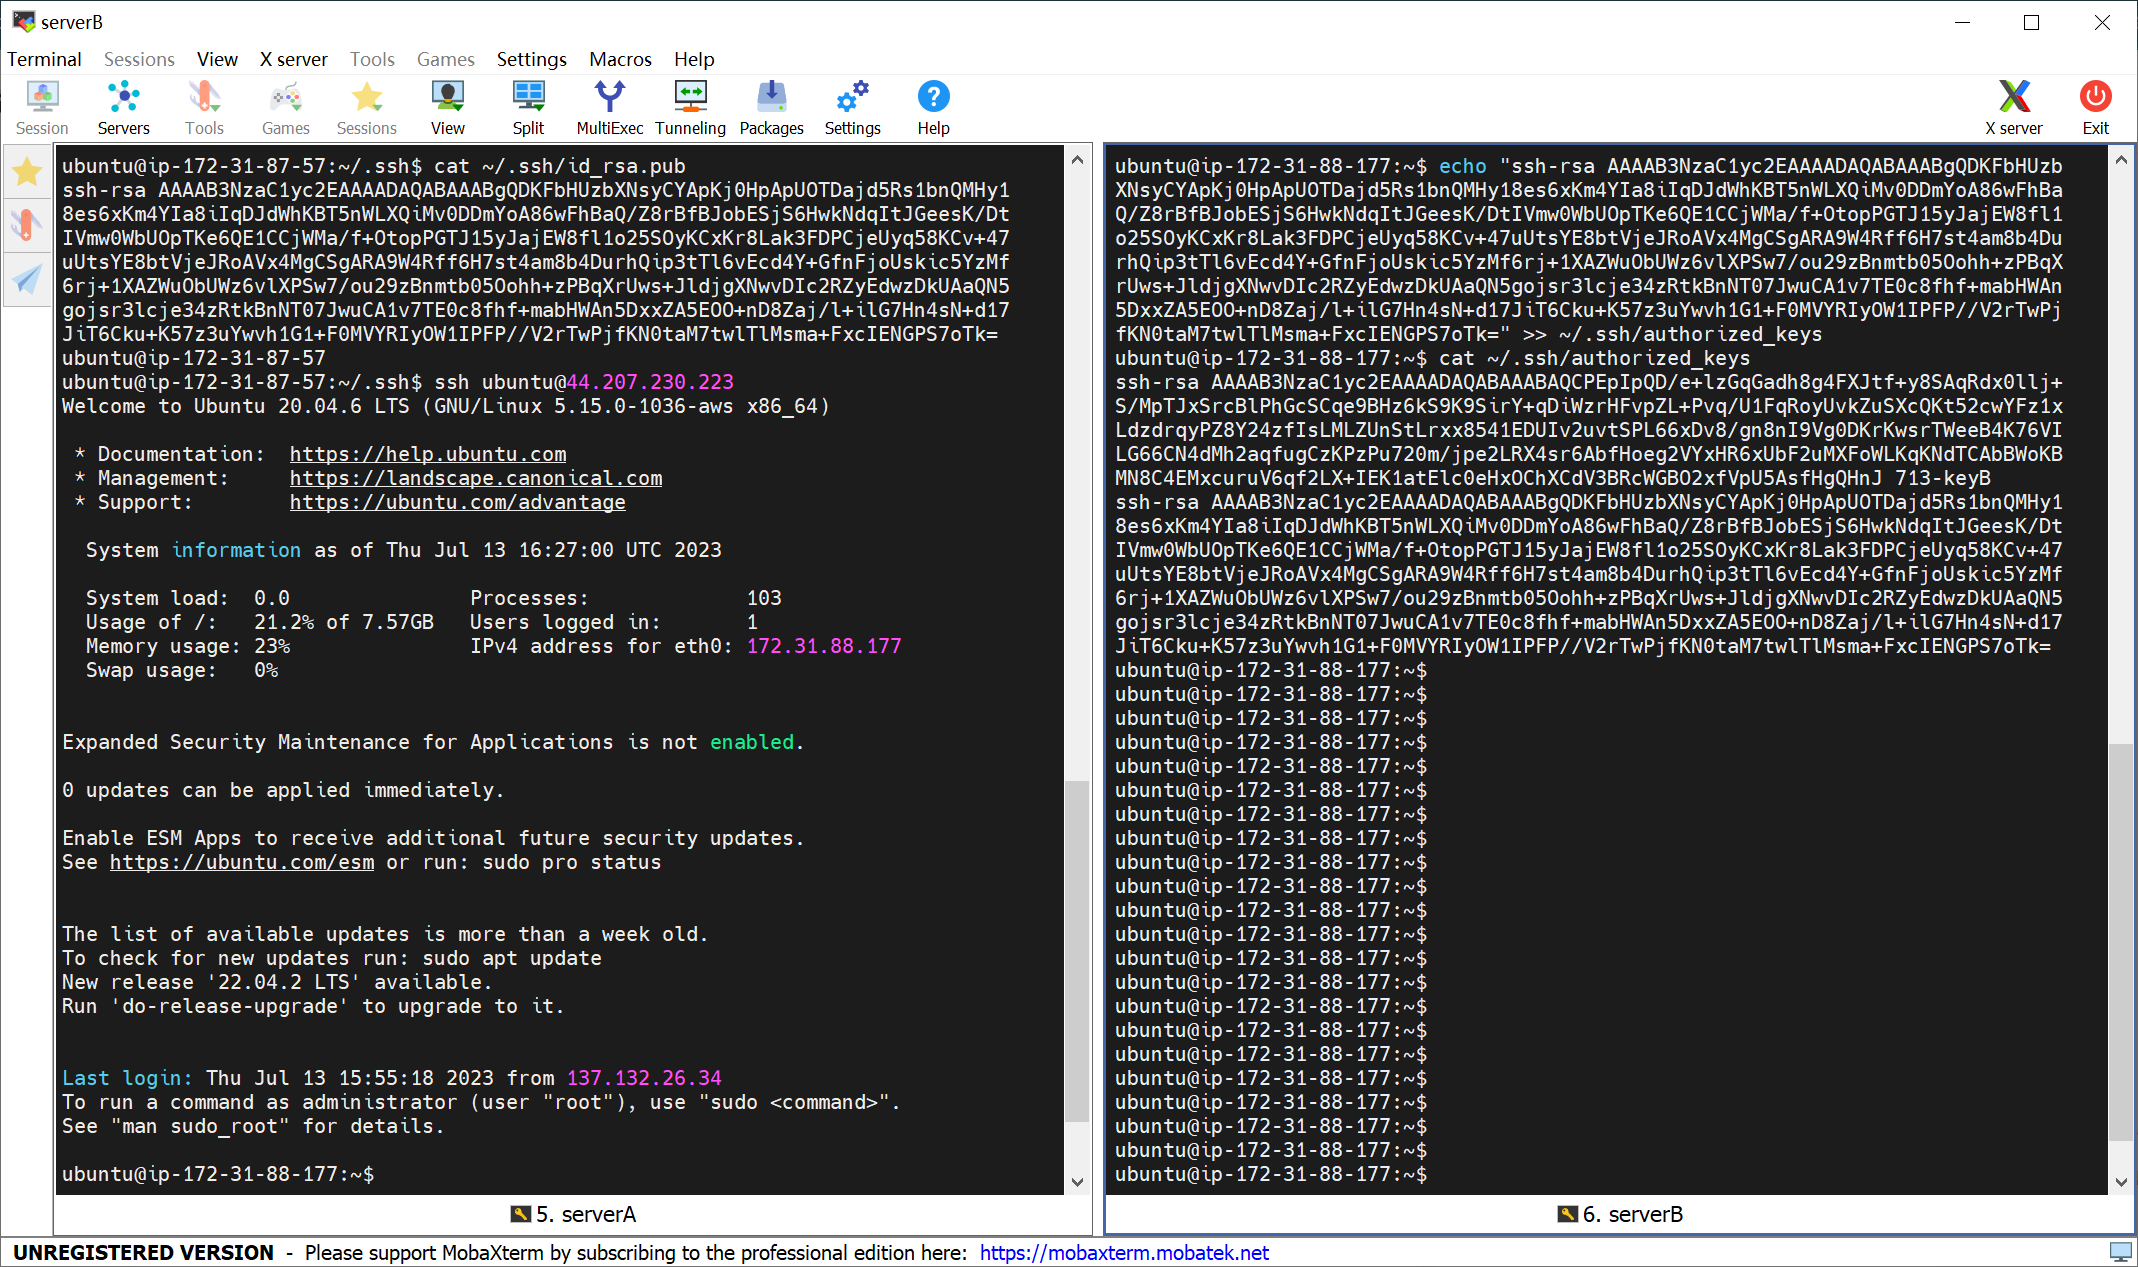
Instead, I use cat ~/.ssh/id_rsa.pub in instance A to
display my public key, and use
echo "MY_PUBLIC_KEY" >> ~/.ssh/authorized_keys in
instance B to paste the key. Now type
ssh ubuntu@44.207.230.223 in instance A, we can access
instance B successfully, without any password! View relevant screenshot
in Figure 4.
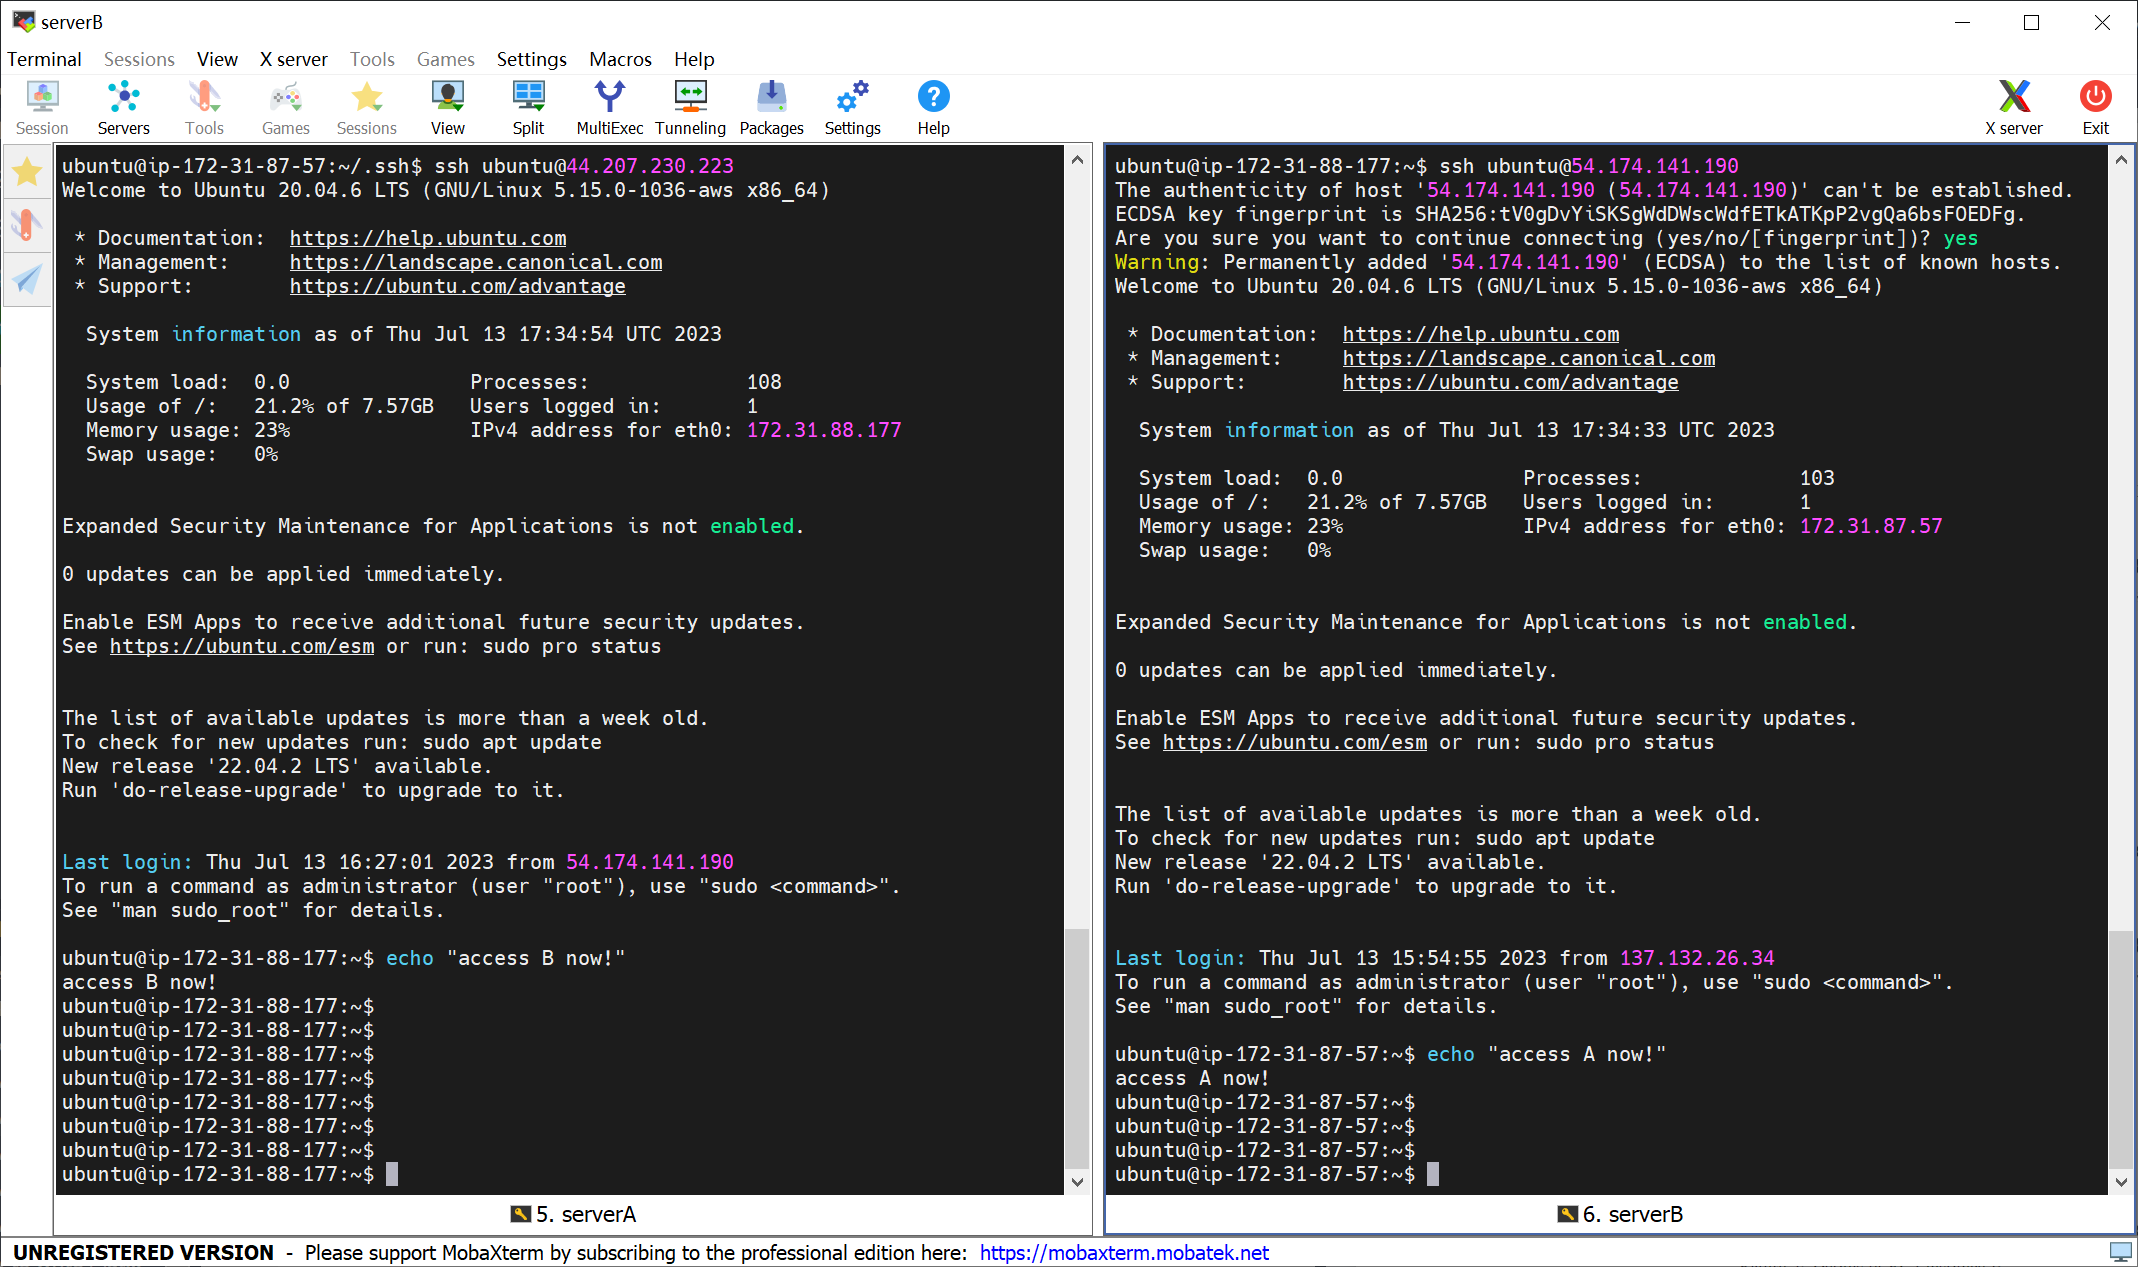
Symmetrically, to make instance B to access to A without any password, just generate ssh-key pair in instance B, and follow the steps above once again. In Figure 5, both A and B successfully access to each other, without password.
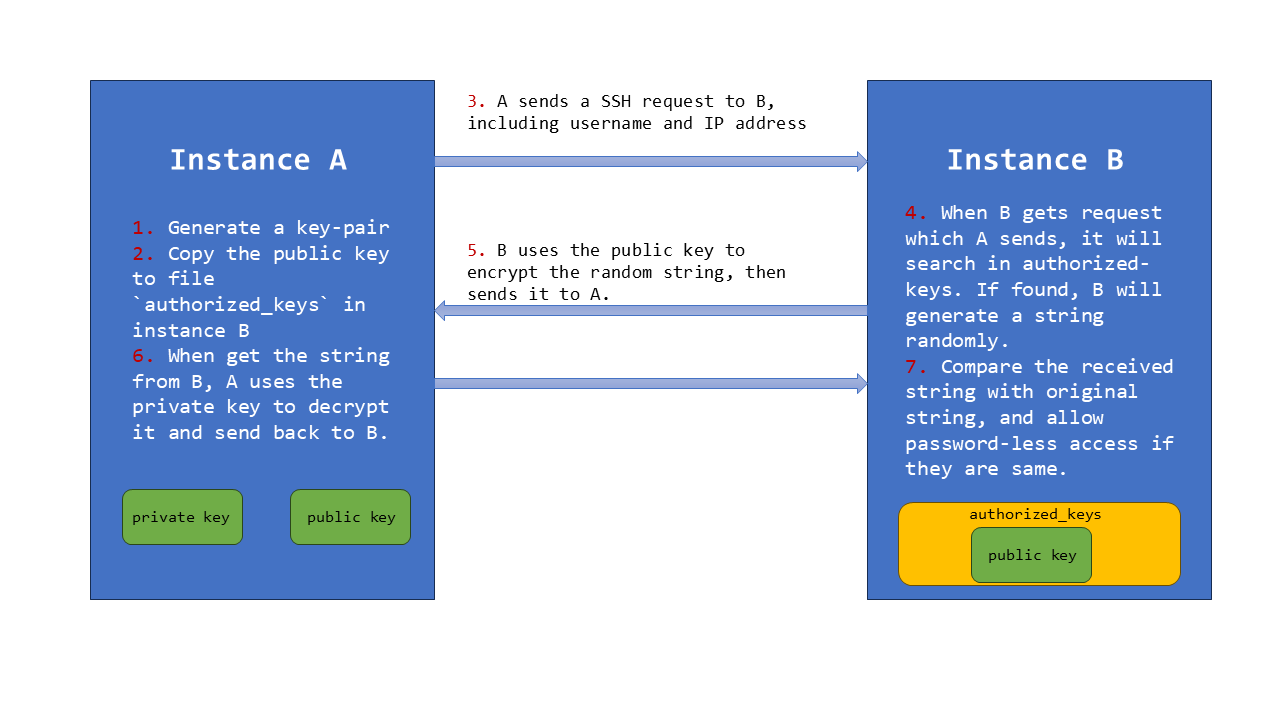
Finally, I summarized the theory of password-less SSH in figure 6.
Password-less SSH using a different port
Similar to Exercise 1.1., create two (2) AWS EC2 instances (virtual machines) with a Linux based operating system (e.g., Ubuntu) and setup passwordless SSH access among them but this time use a different port for the SSH server (change the default port 22 to port 2222). Do you need to make any other modifications to your EC2 instances? [4 marks]
Let's continue on the basis of Exercise 1.1. We have achieved password-less SSH access in the default port 22, and now we need to achieve it in port 2222.
First, I edit the security groups of instance A and B, adding a new rule to allow 2222 port, just like Figure 7 below.
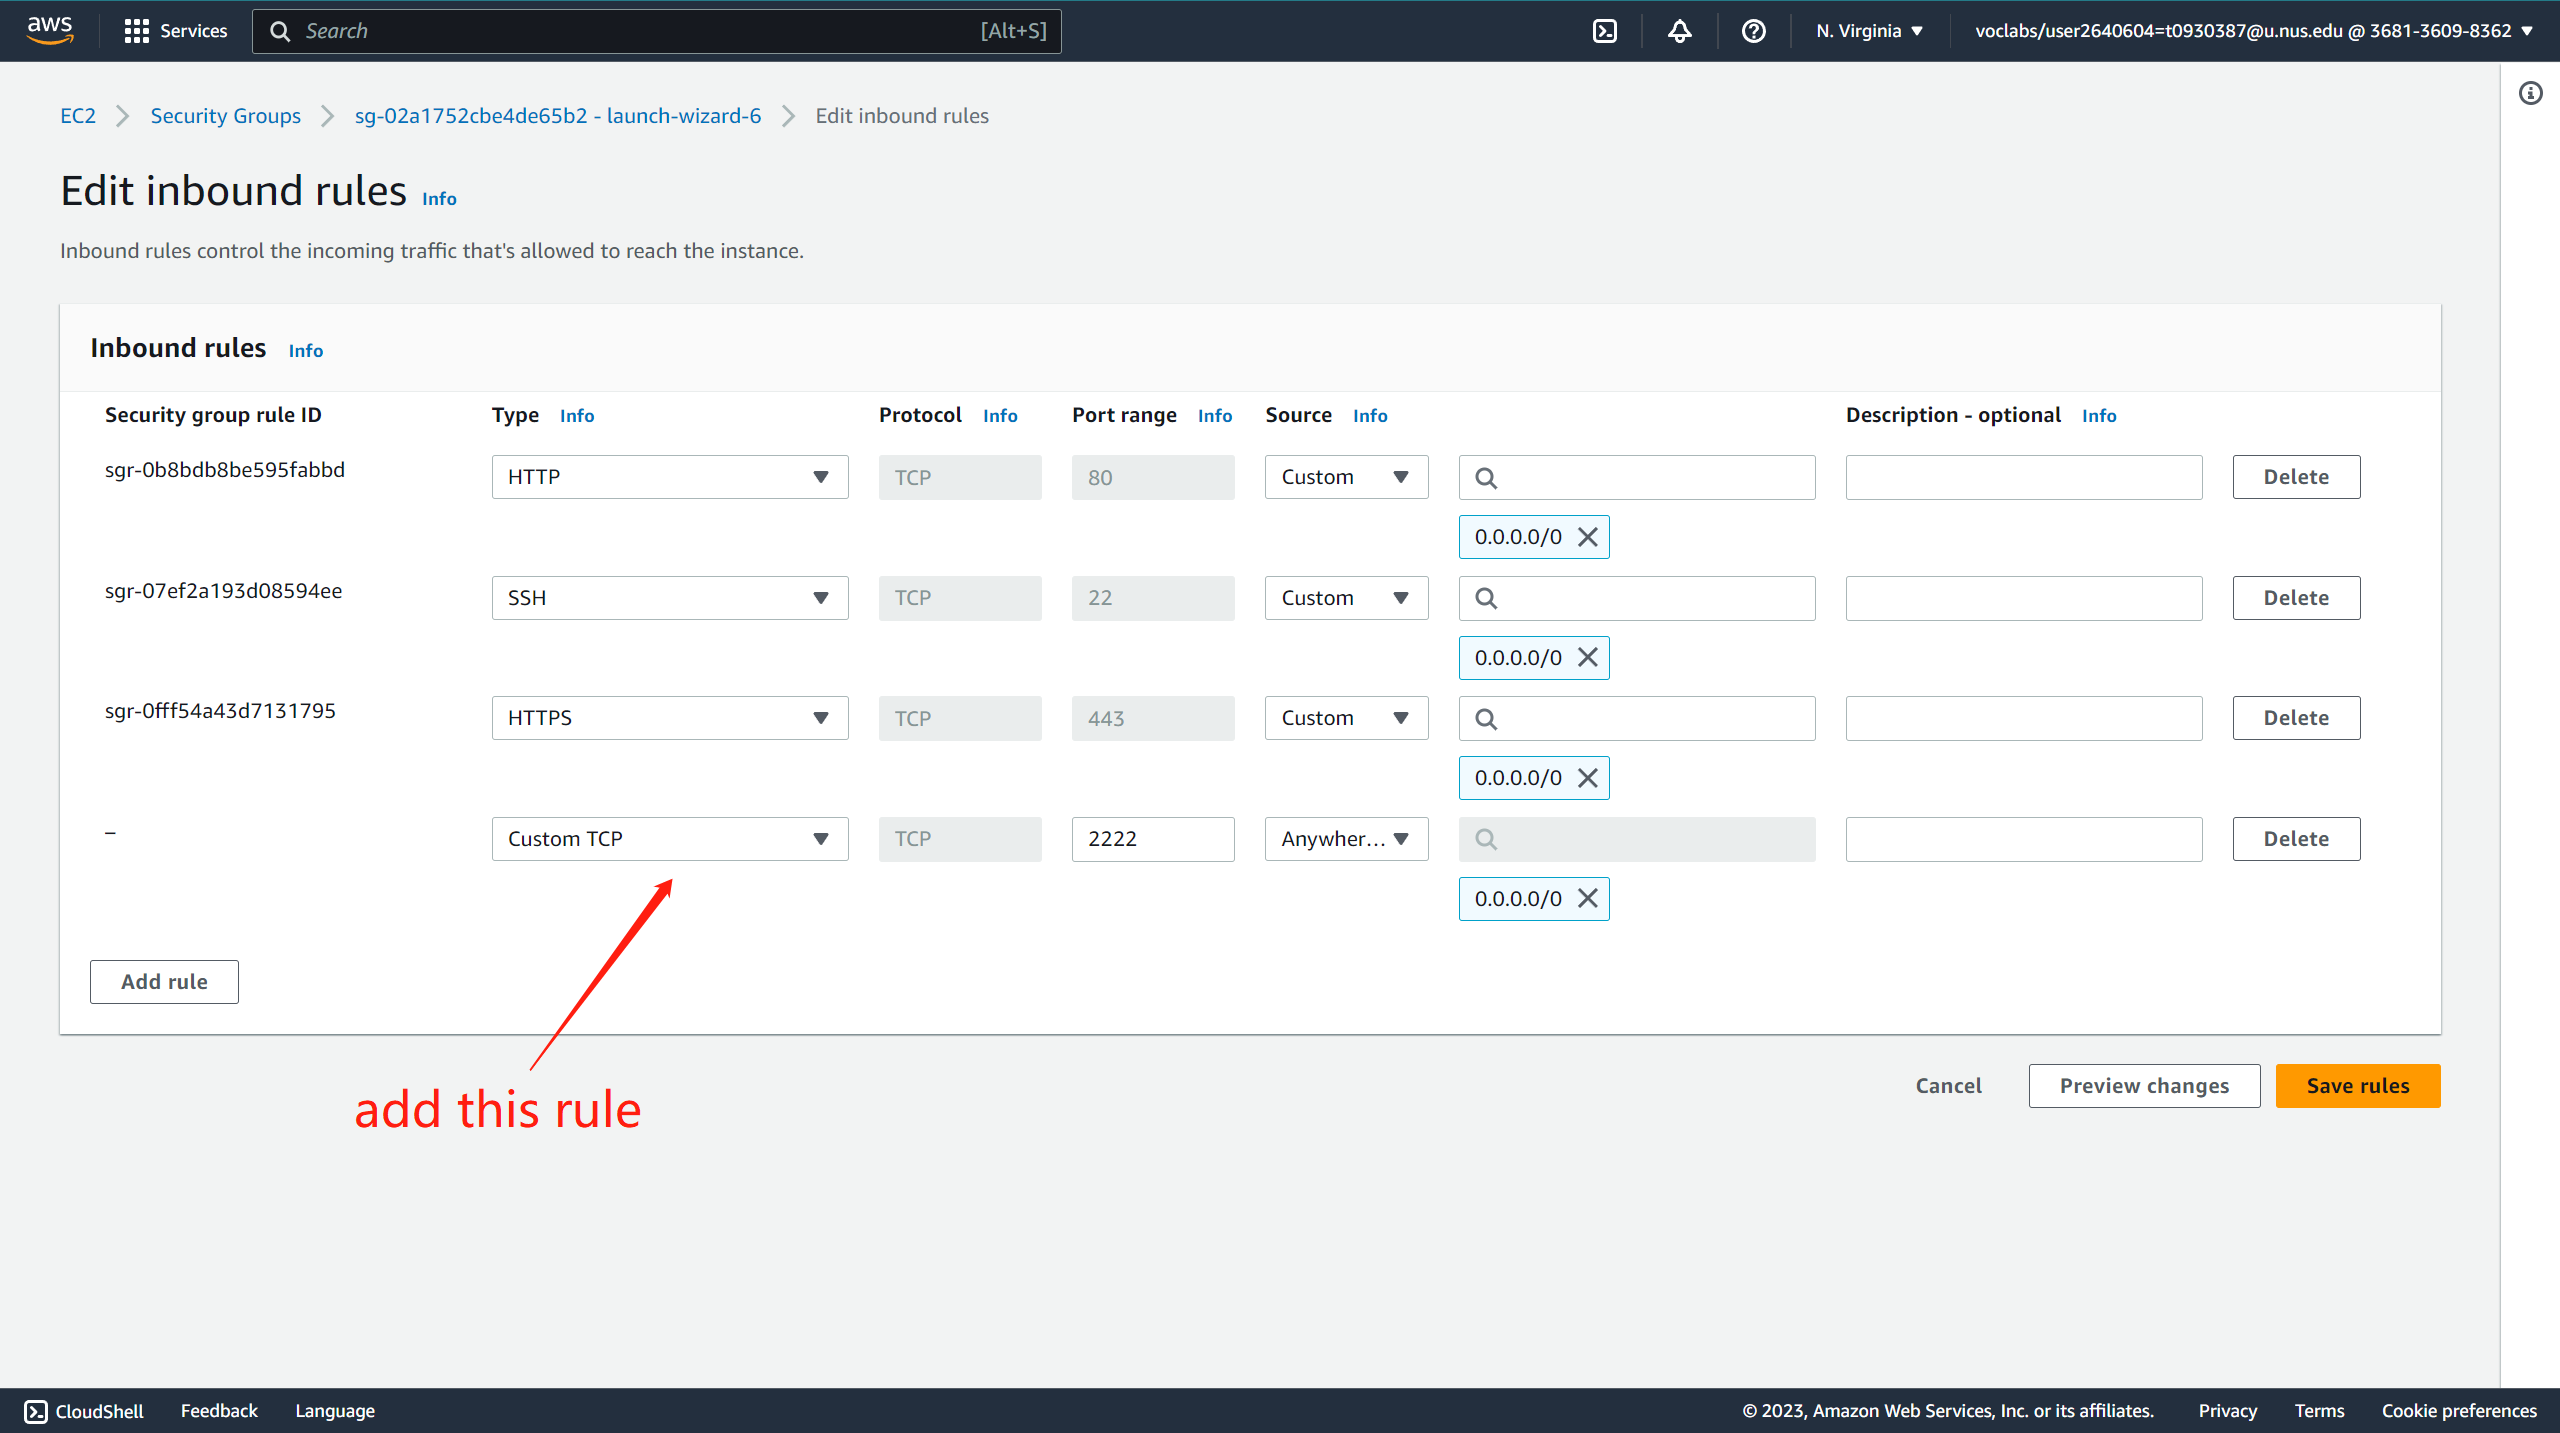
Then I add Port 2222 in /etc/ssh/sshd_config, shown in
Figure 8.
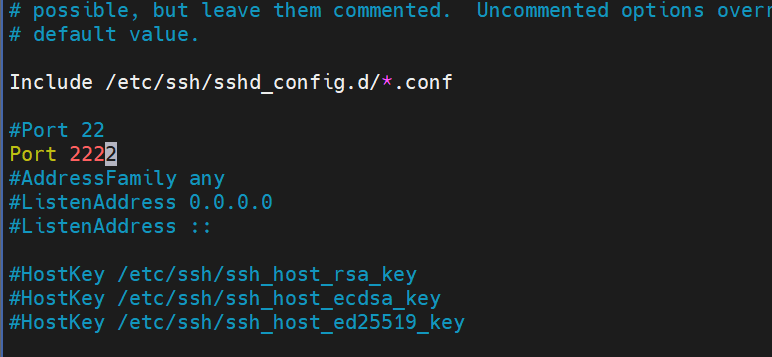
However, I failed for the first time. How could be? The key is not to
forget to restart the service. Type
sudo service ssh restart to restart service, and then do
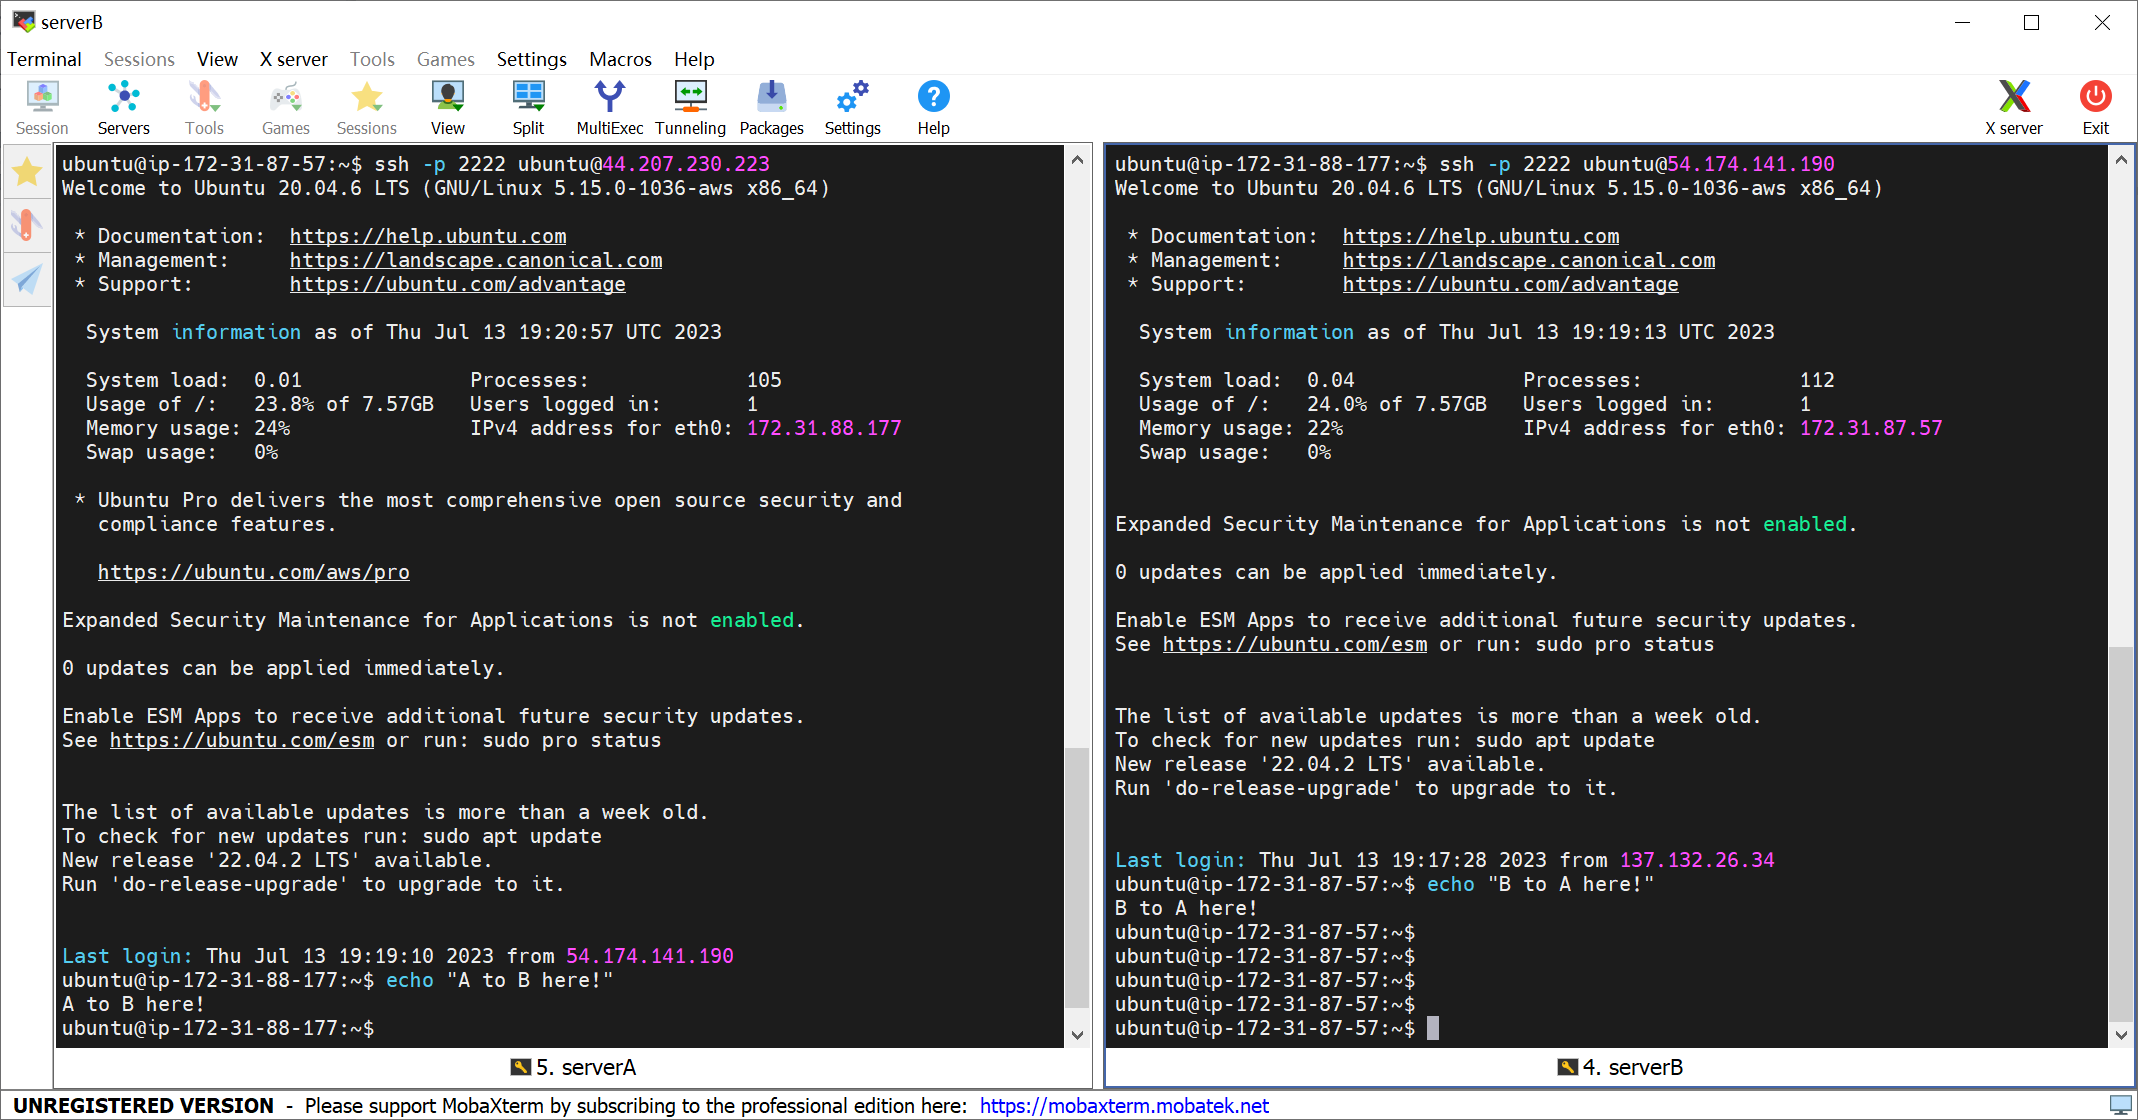
password-less SSH access. In figure 9, Instance A and B can
password-less access to each other using Port 2222.
Exercise 1.2
Start: Hello World!
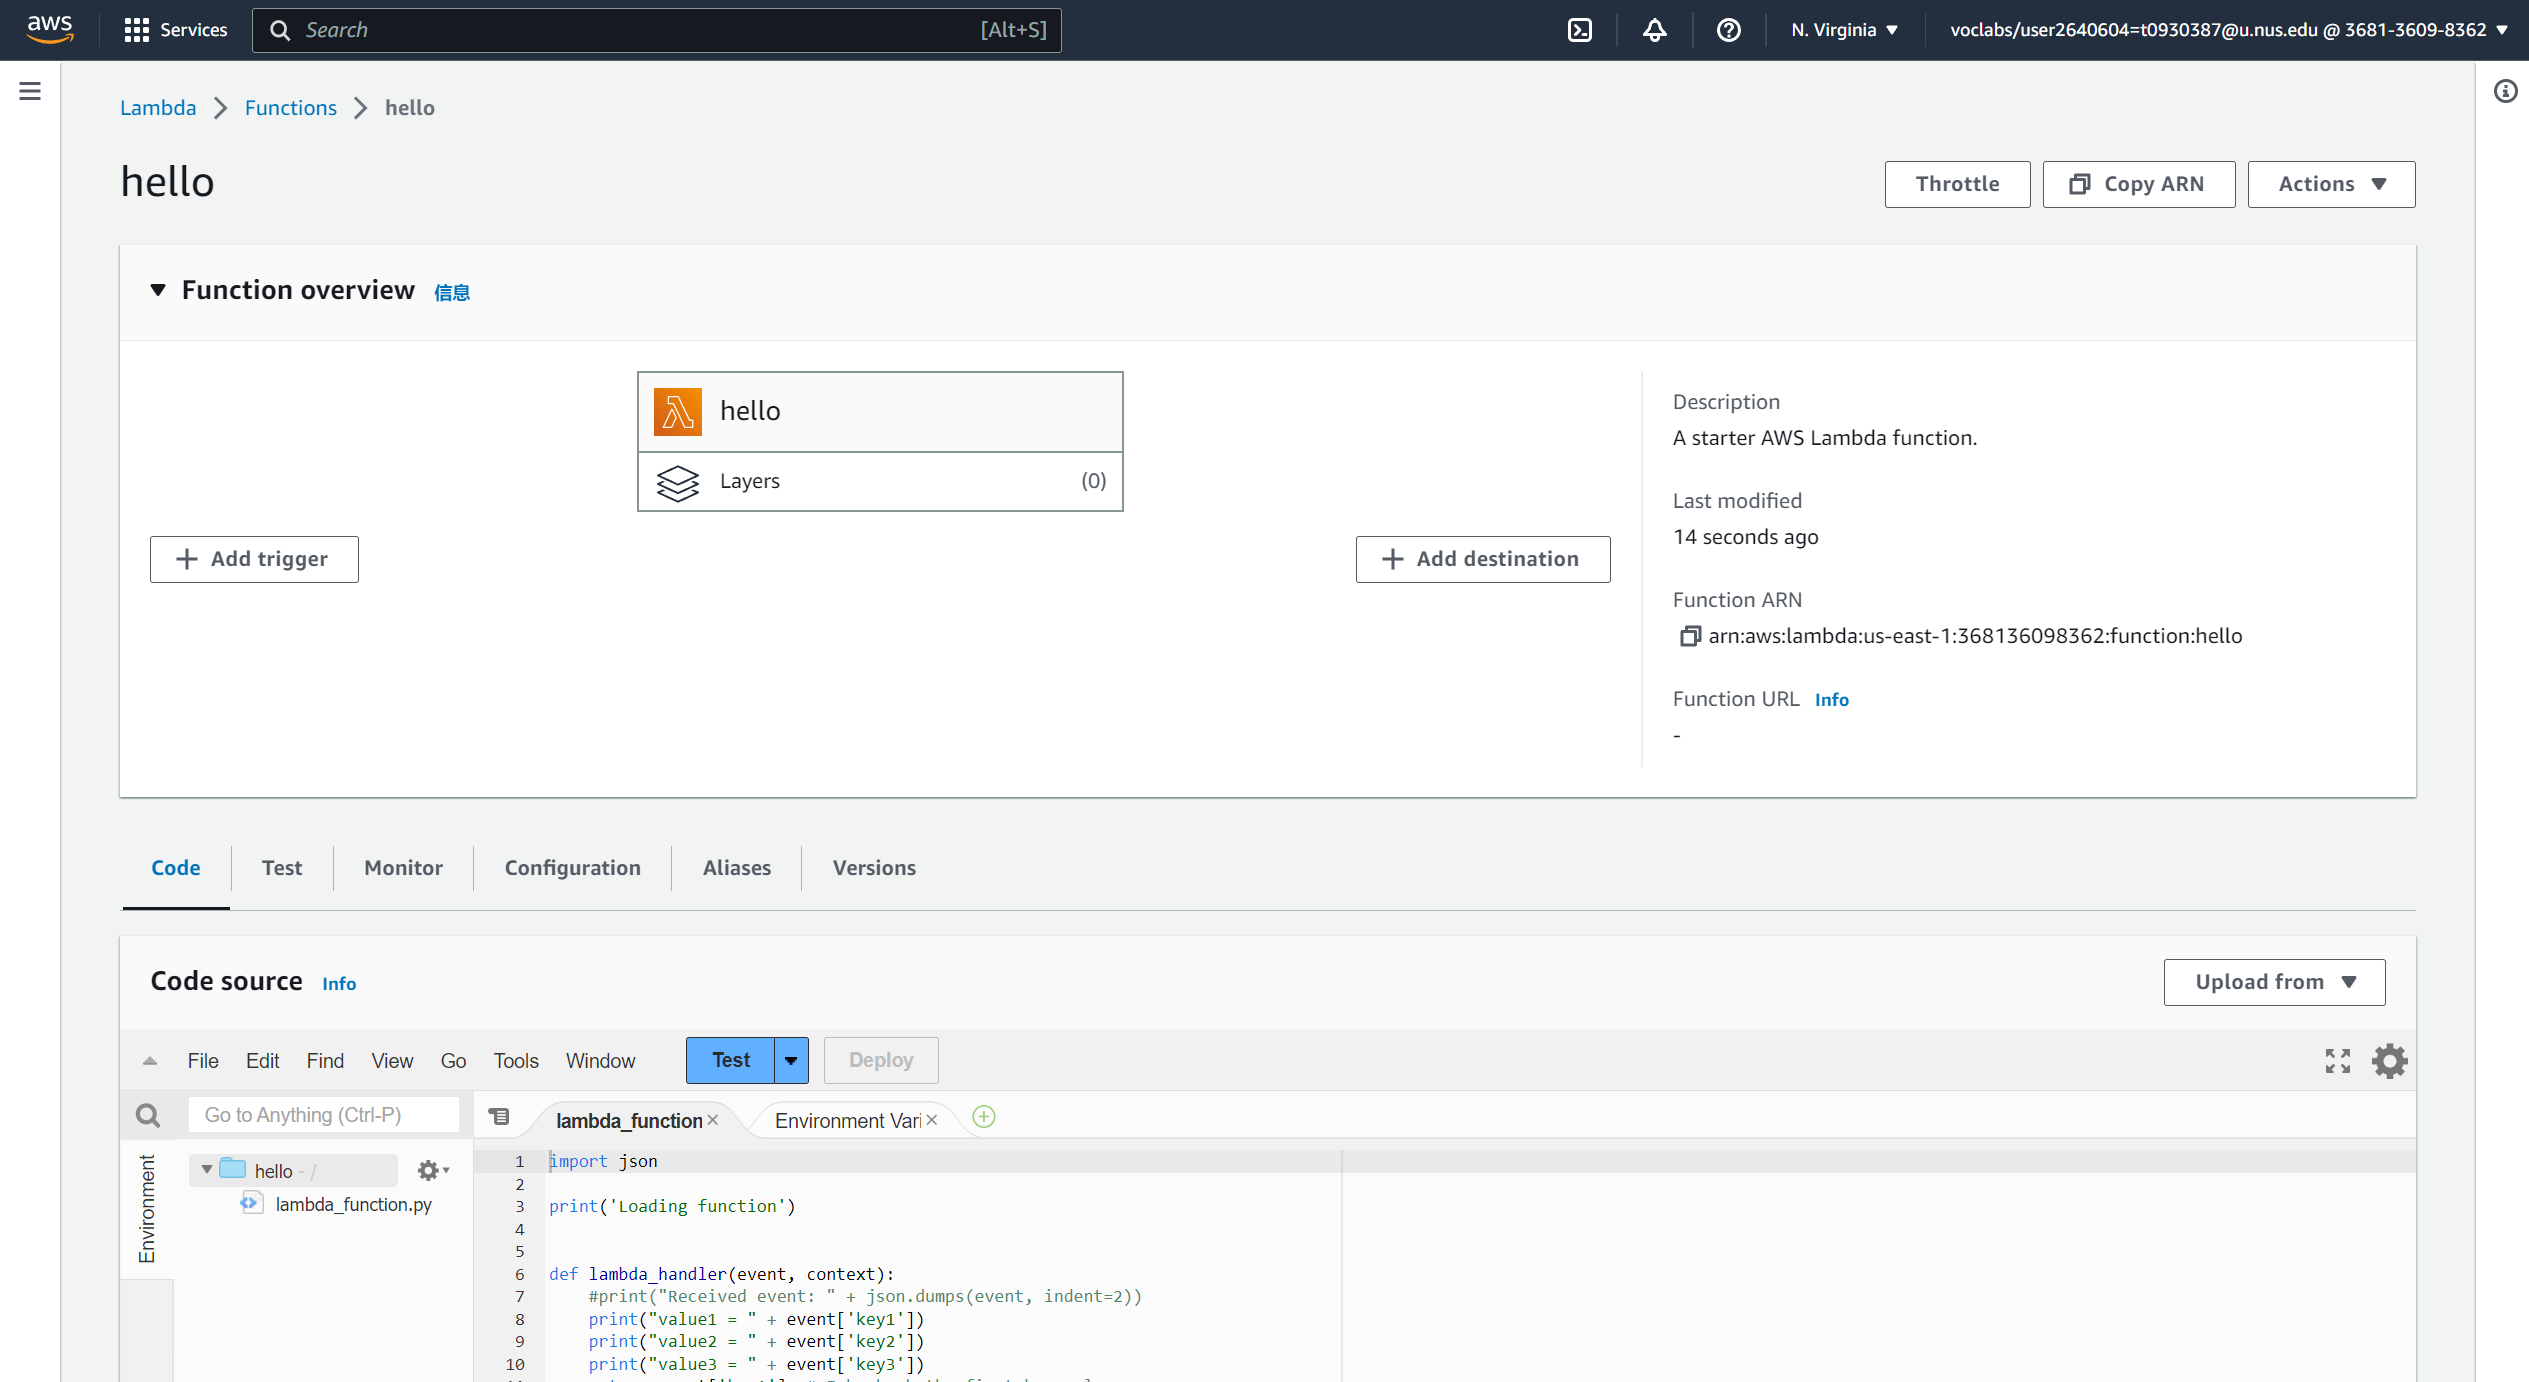
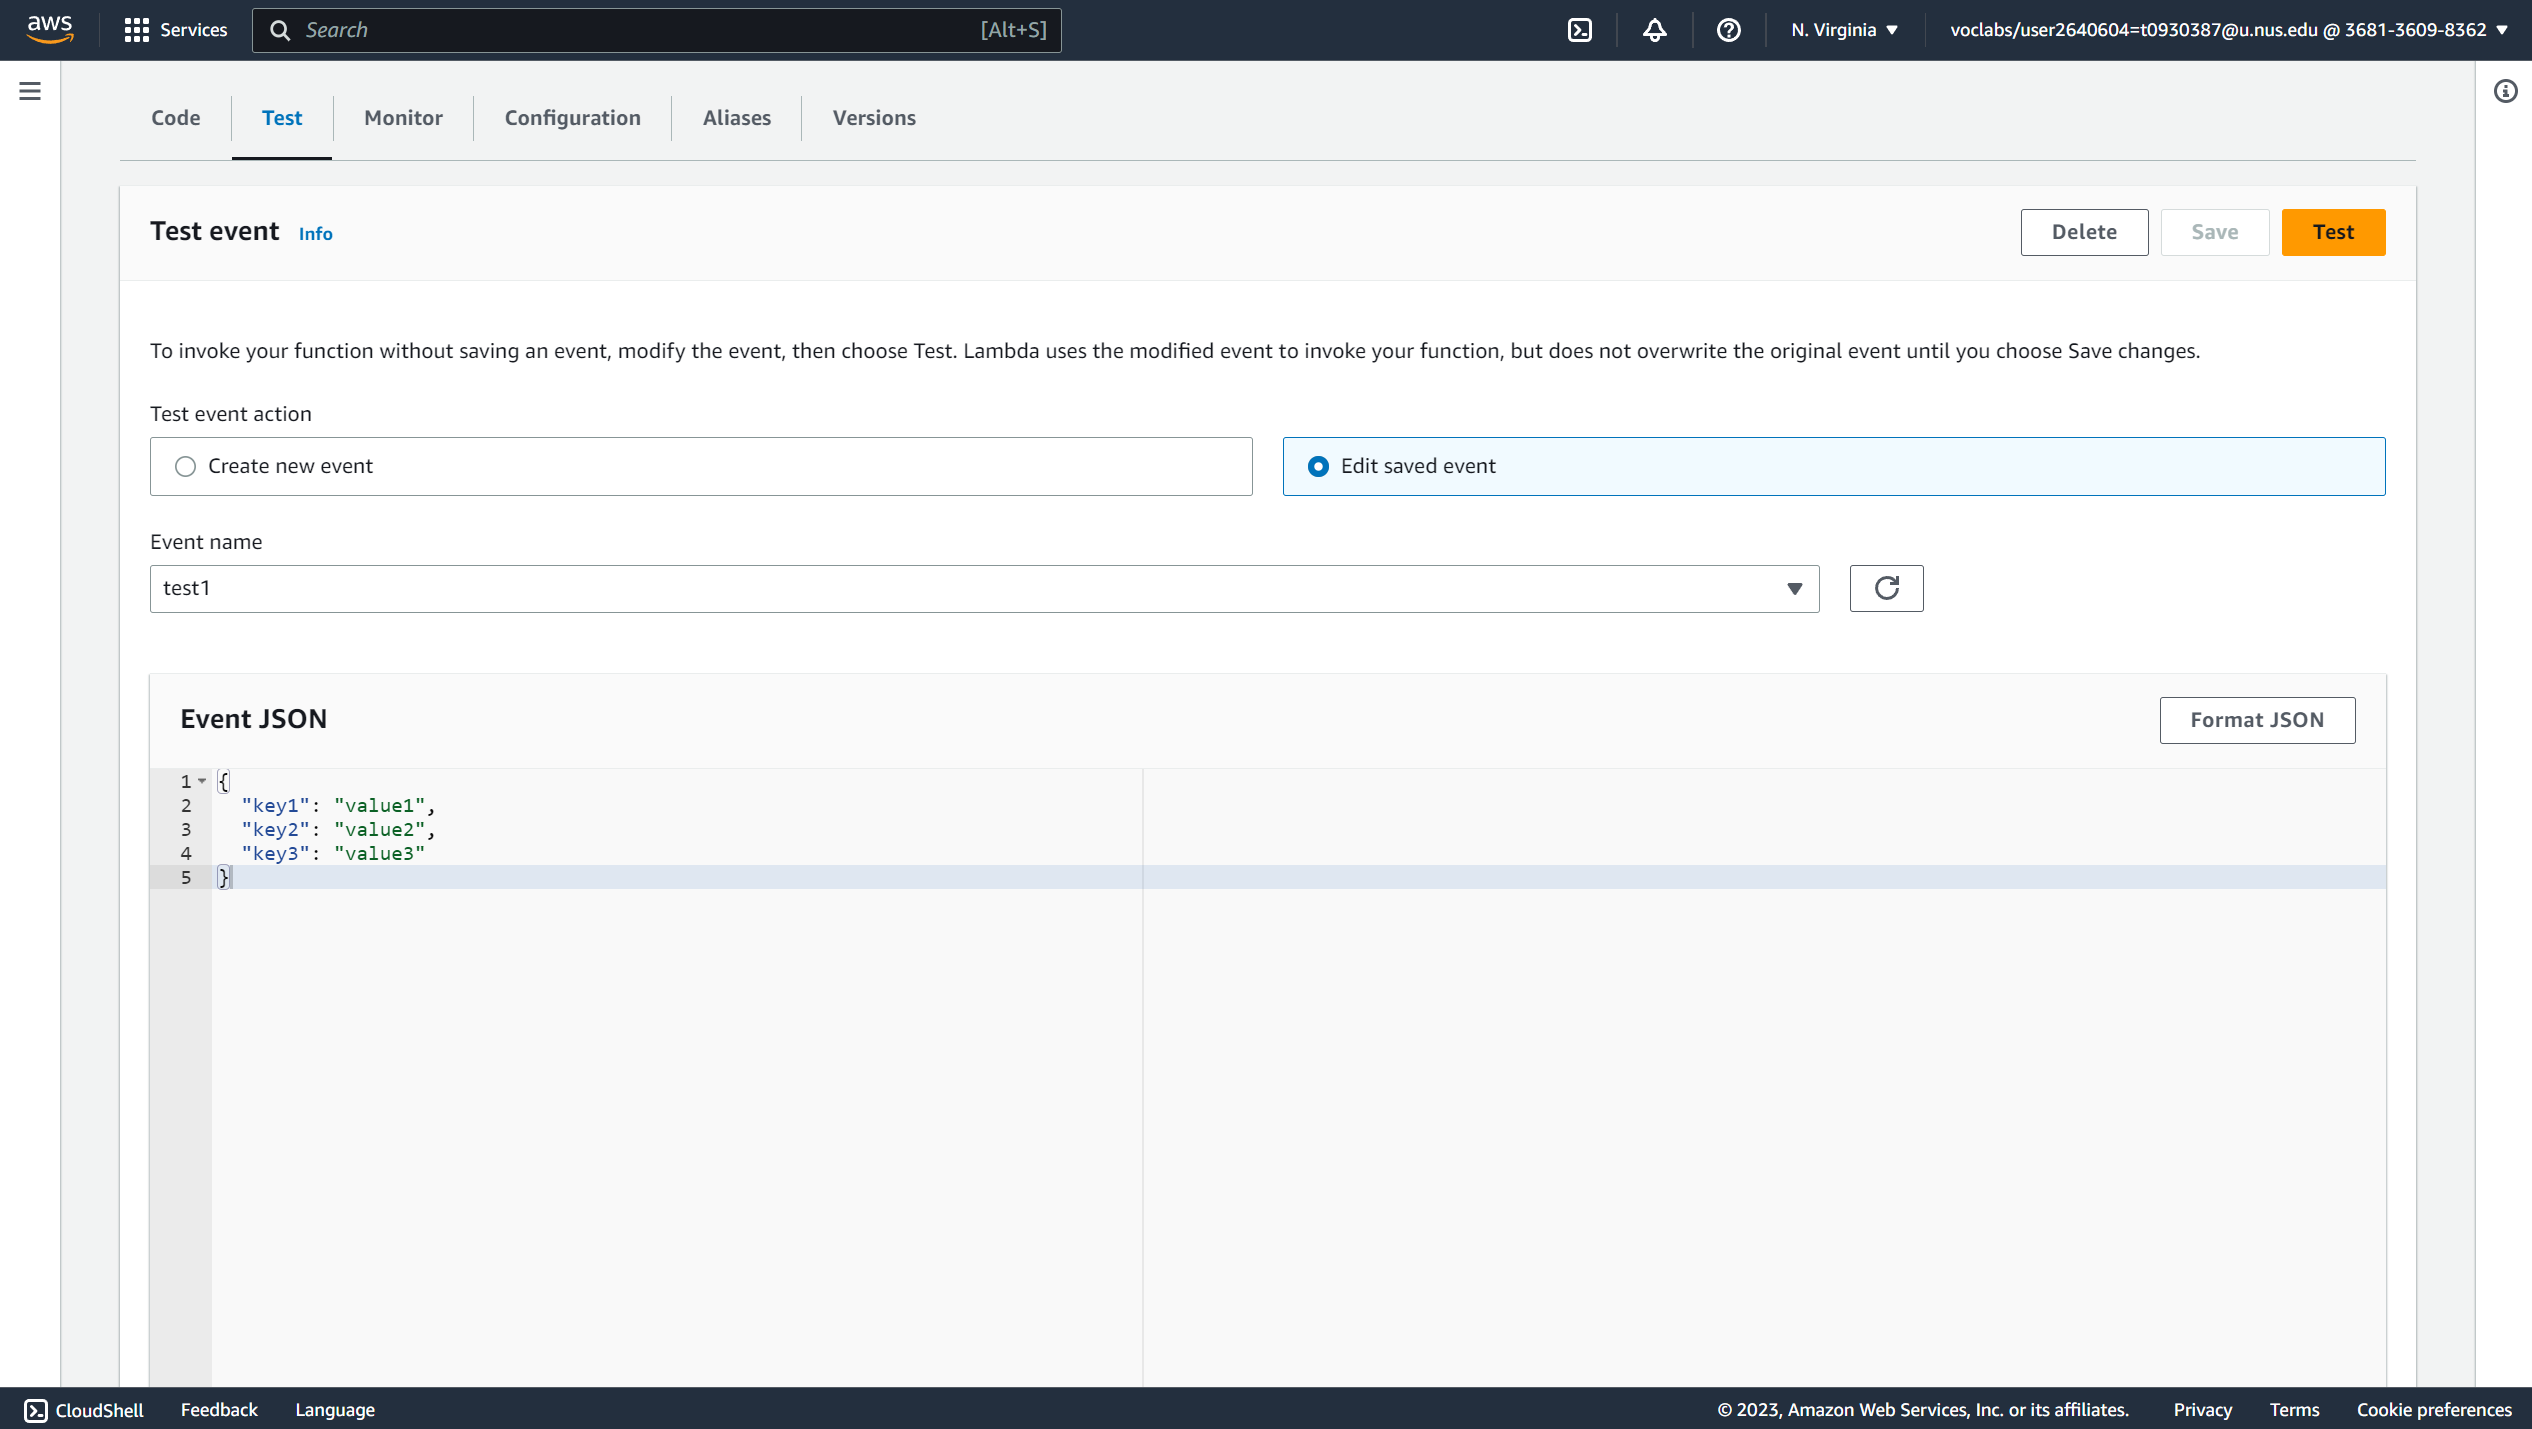
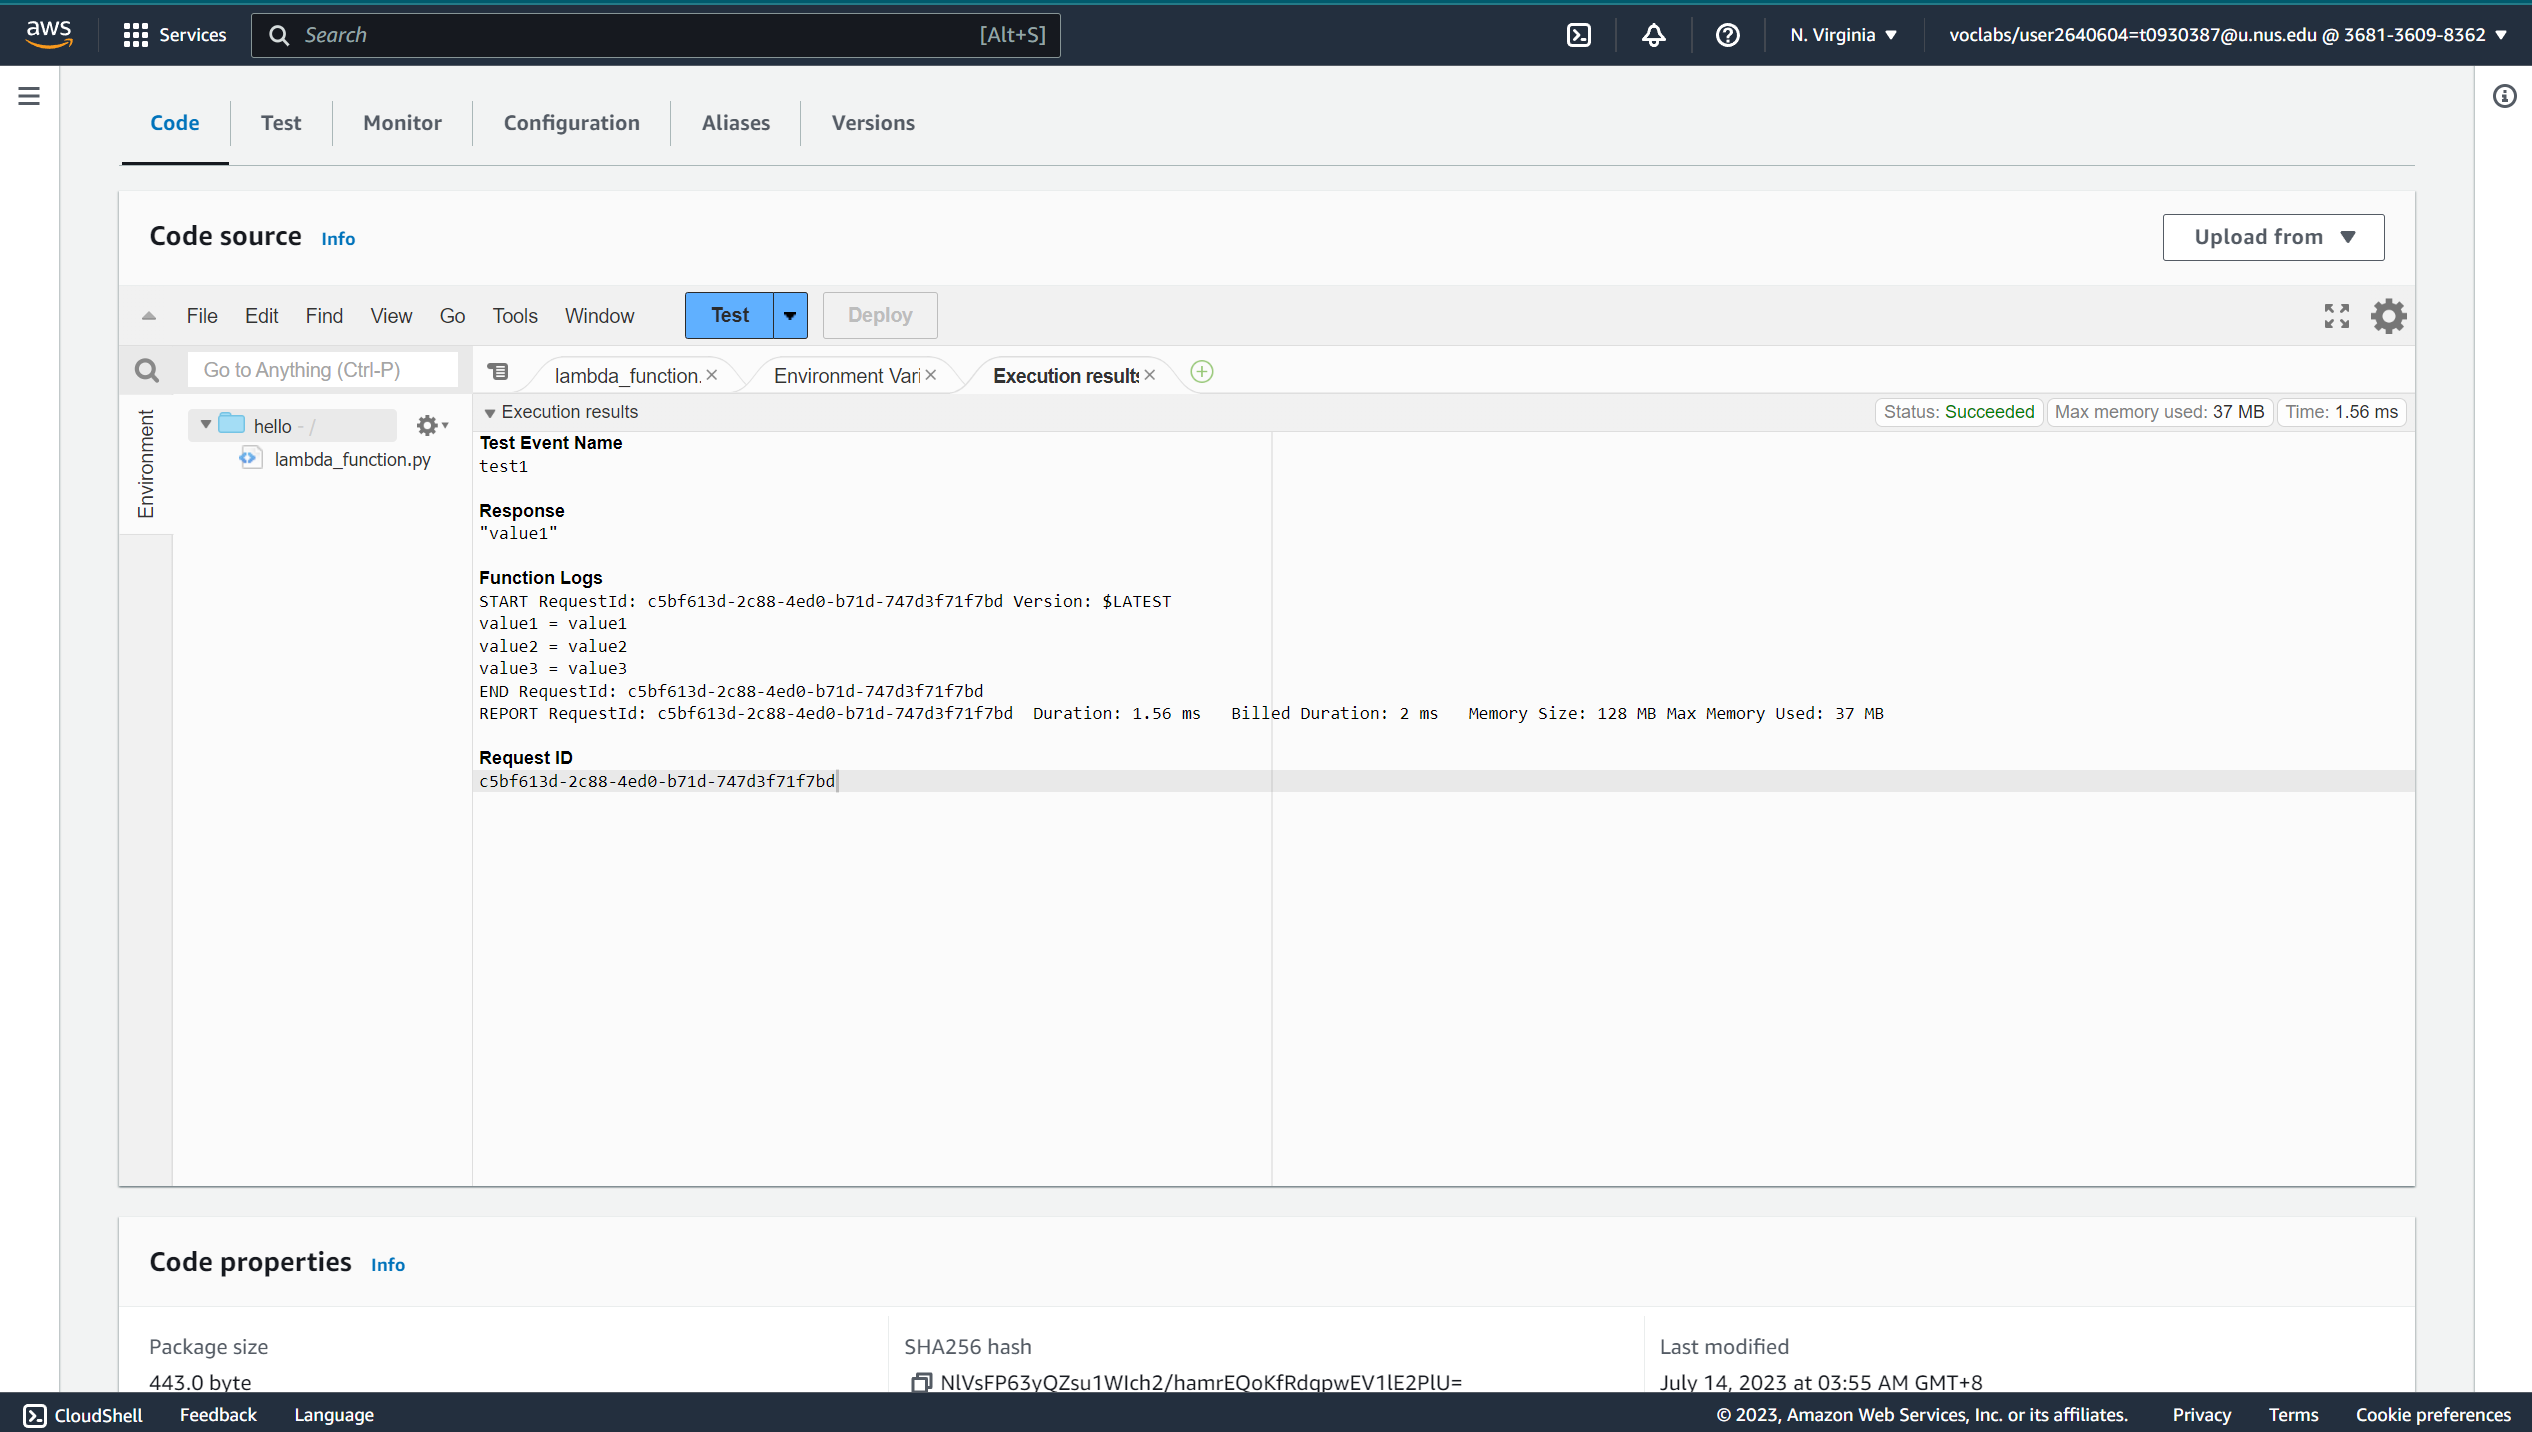
Start by creating and running a Python AWS hello world using AWS Management Console, as shown during Lecture 2. Take screenshots of your Lambda function, test event and the log output to show that the program runs successfully. Pay attention to setting the role of the Lambda function to “LabRole”. [2 marks]
I create and run a Python AWS hello world using AWS Management Console, the screenshots of lambda function, test event and the log output are shown in Figure 10/11/12.
Create an AWS SQS
Create an AWS Simple Queue Service (SQS) Queue and take a screenshot of the created queue. After creating the queue, note down its Amazon Resource Name (ARN). [2 marks]
Here we create a AWS SQS Queue shown in Figure 13. The ARN is
arn:aws:sqs:us-east-1:368136098362:Queue1

Change the code of Lambda Function
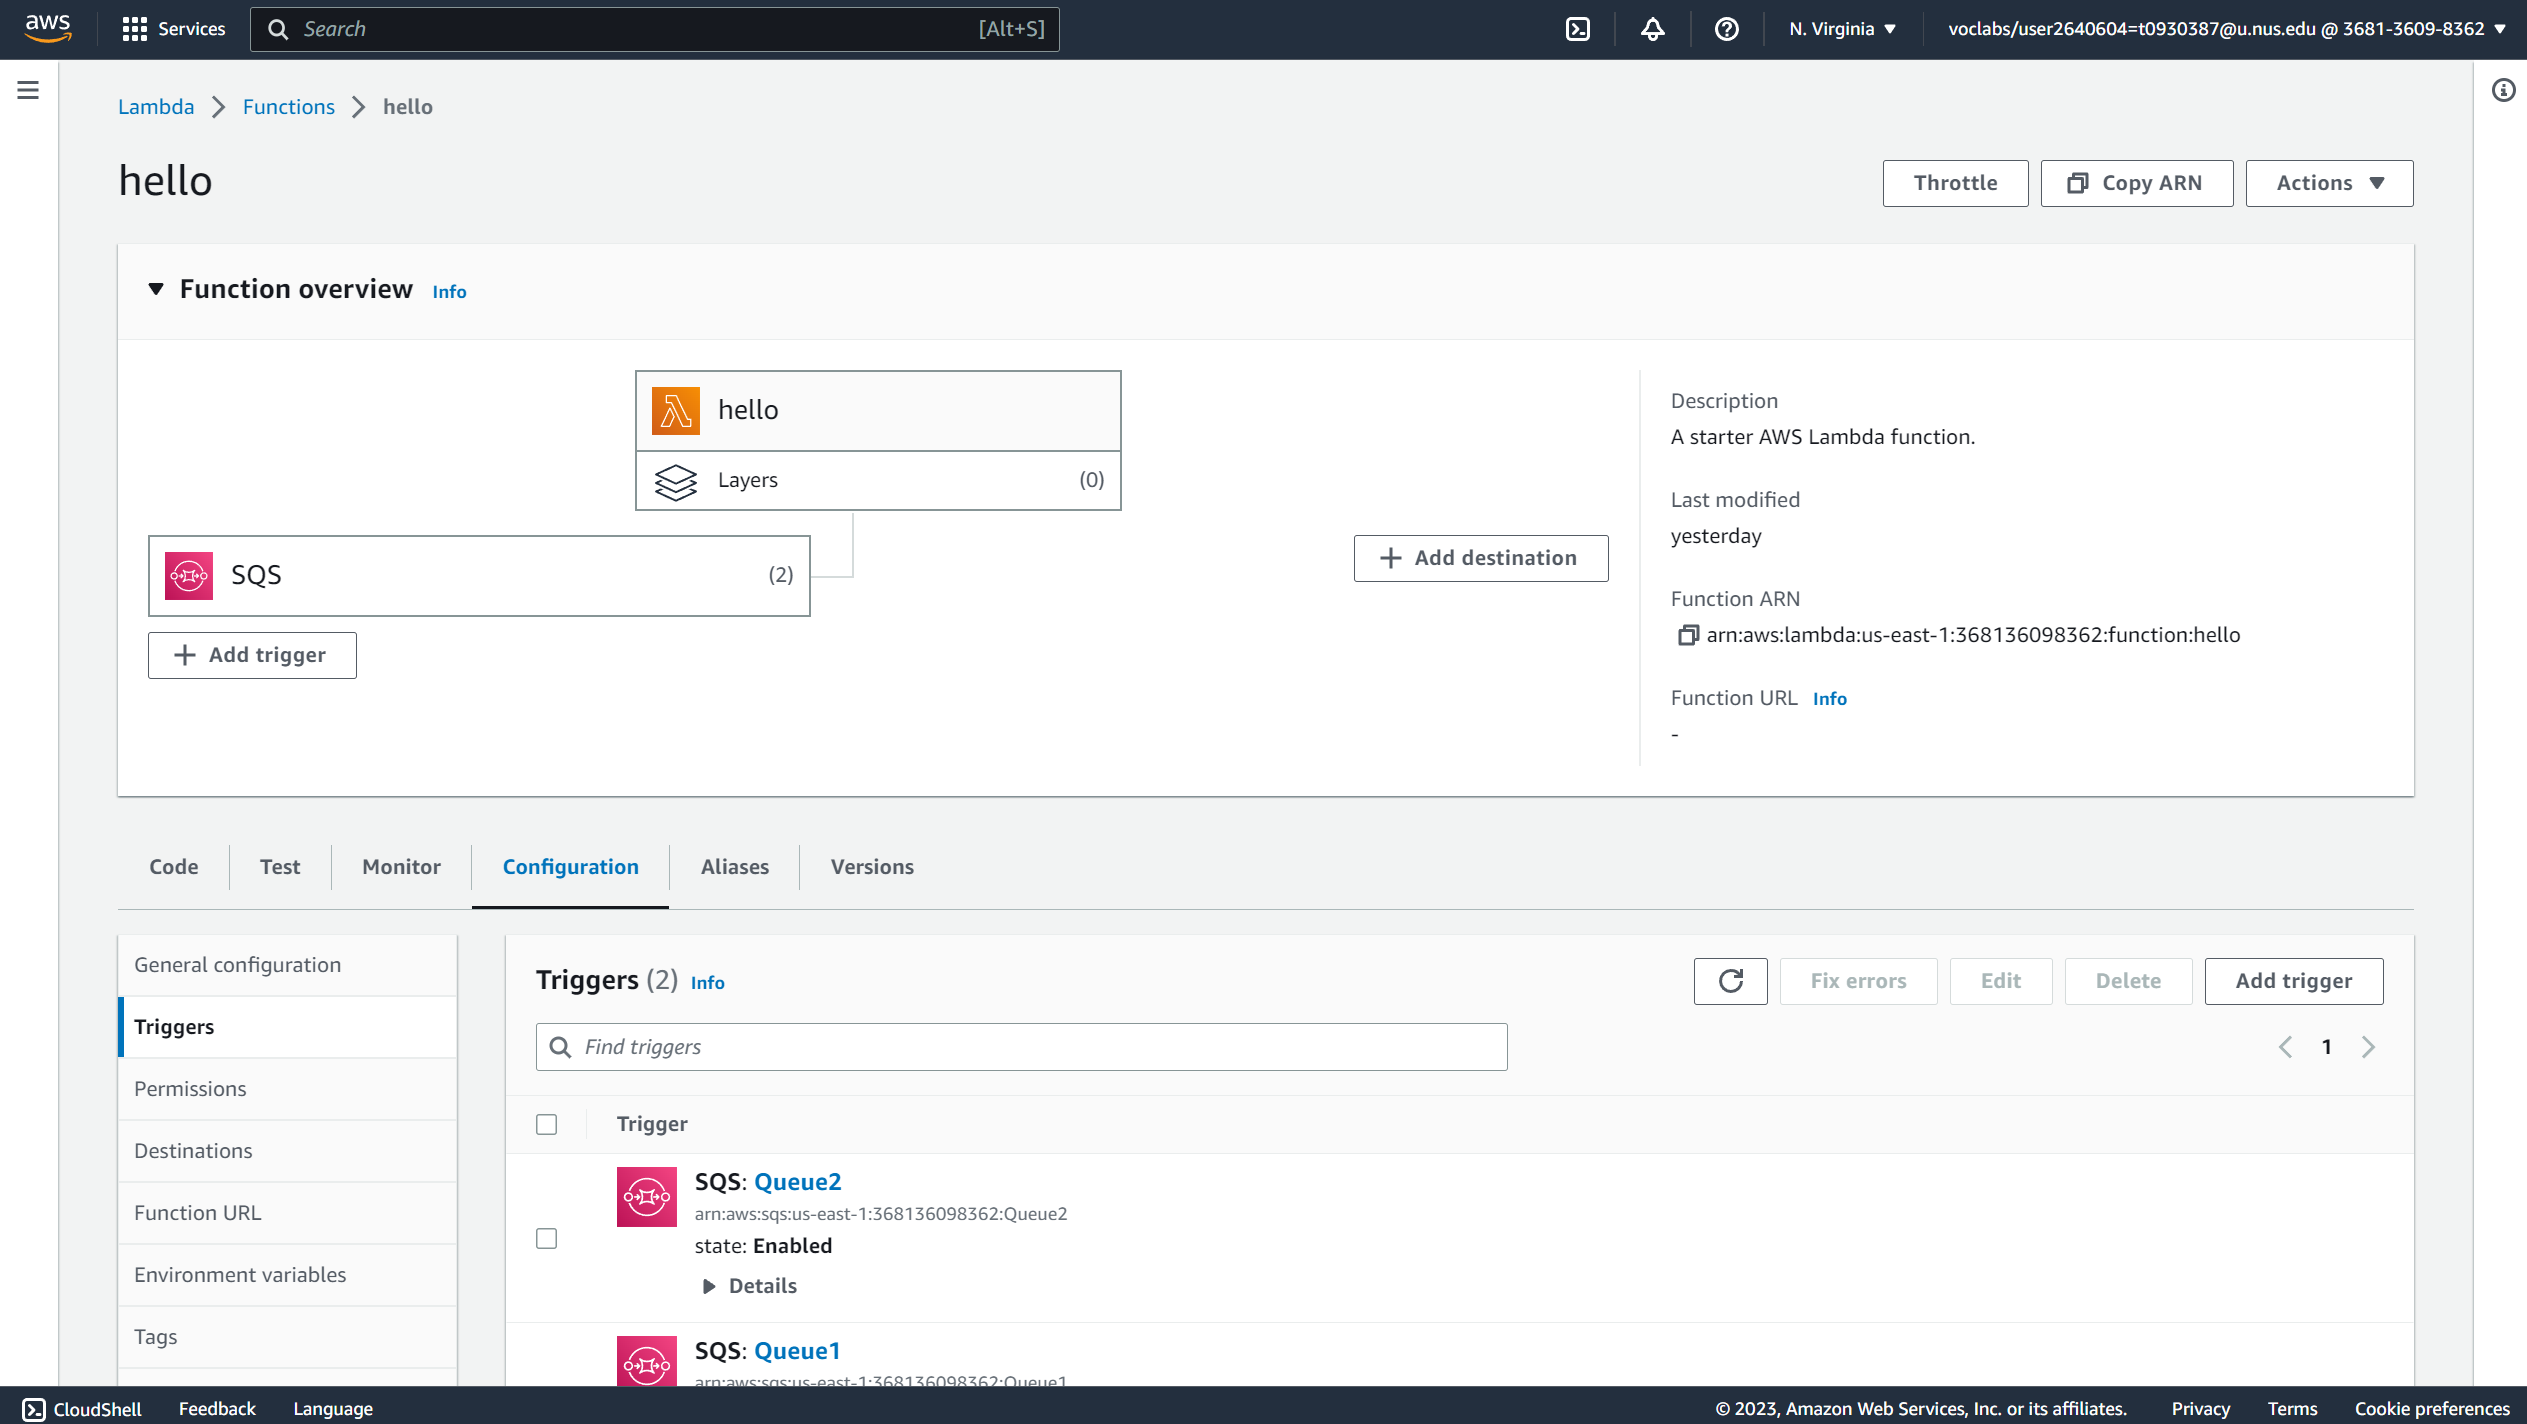
Change the code of your Lambda function such that it returns the received message from SQS. You are allowed to search on the Internet for how to do that. Please include the code in your submission(report). Next, add the created queue (identified by its ARN) as trigger for the Lambda function. Take a screenshot of the “Function overview Info” section of your Lambda function. [2 marks]
Now we need to change the code of the Lambda function such that it returns the received message from SQS. The code is shown in the block below.
1 | import json |
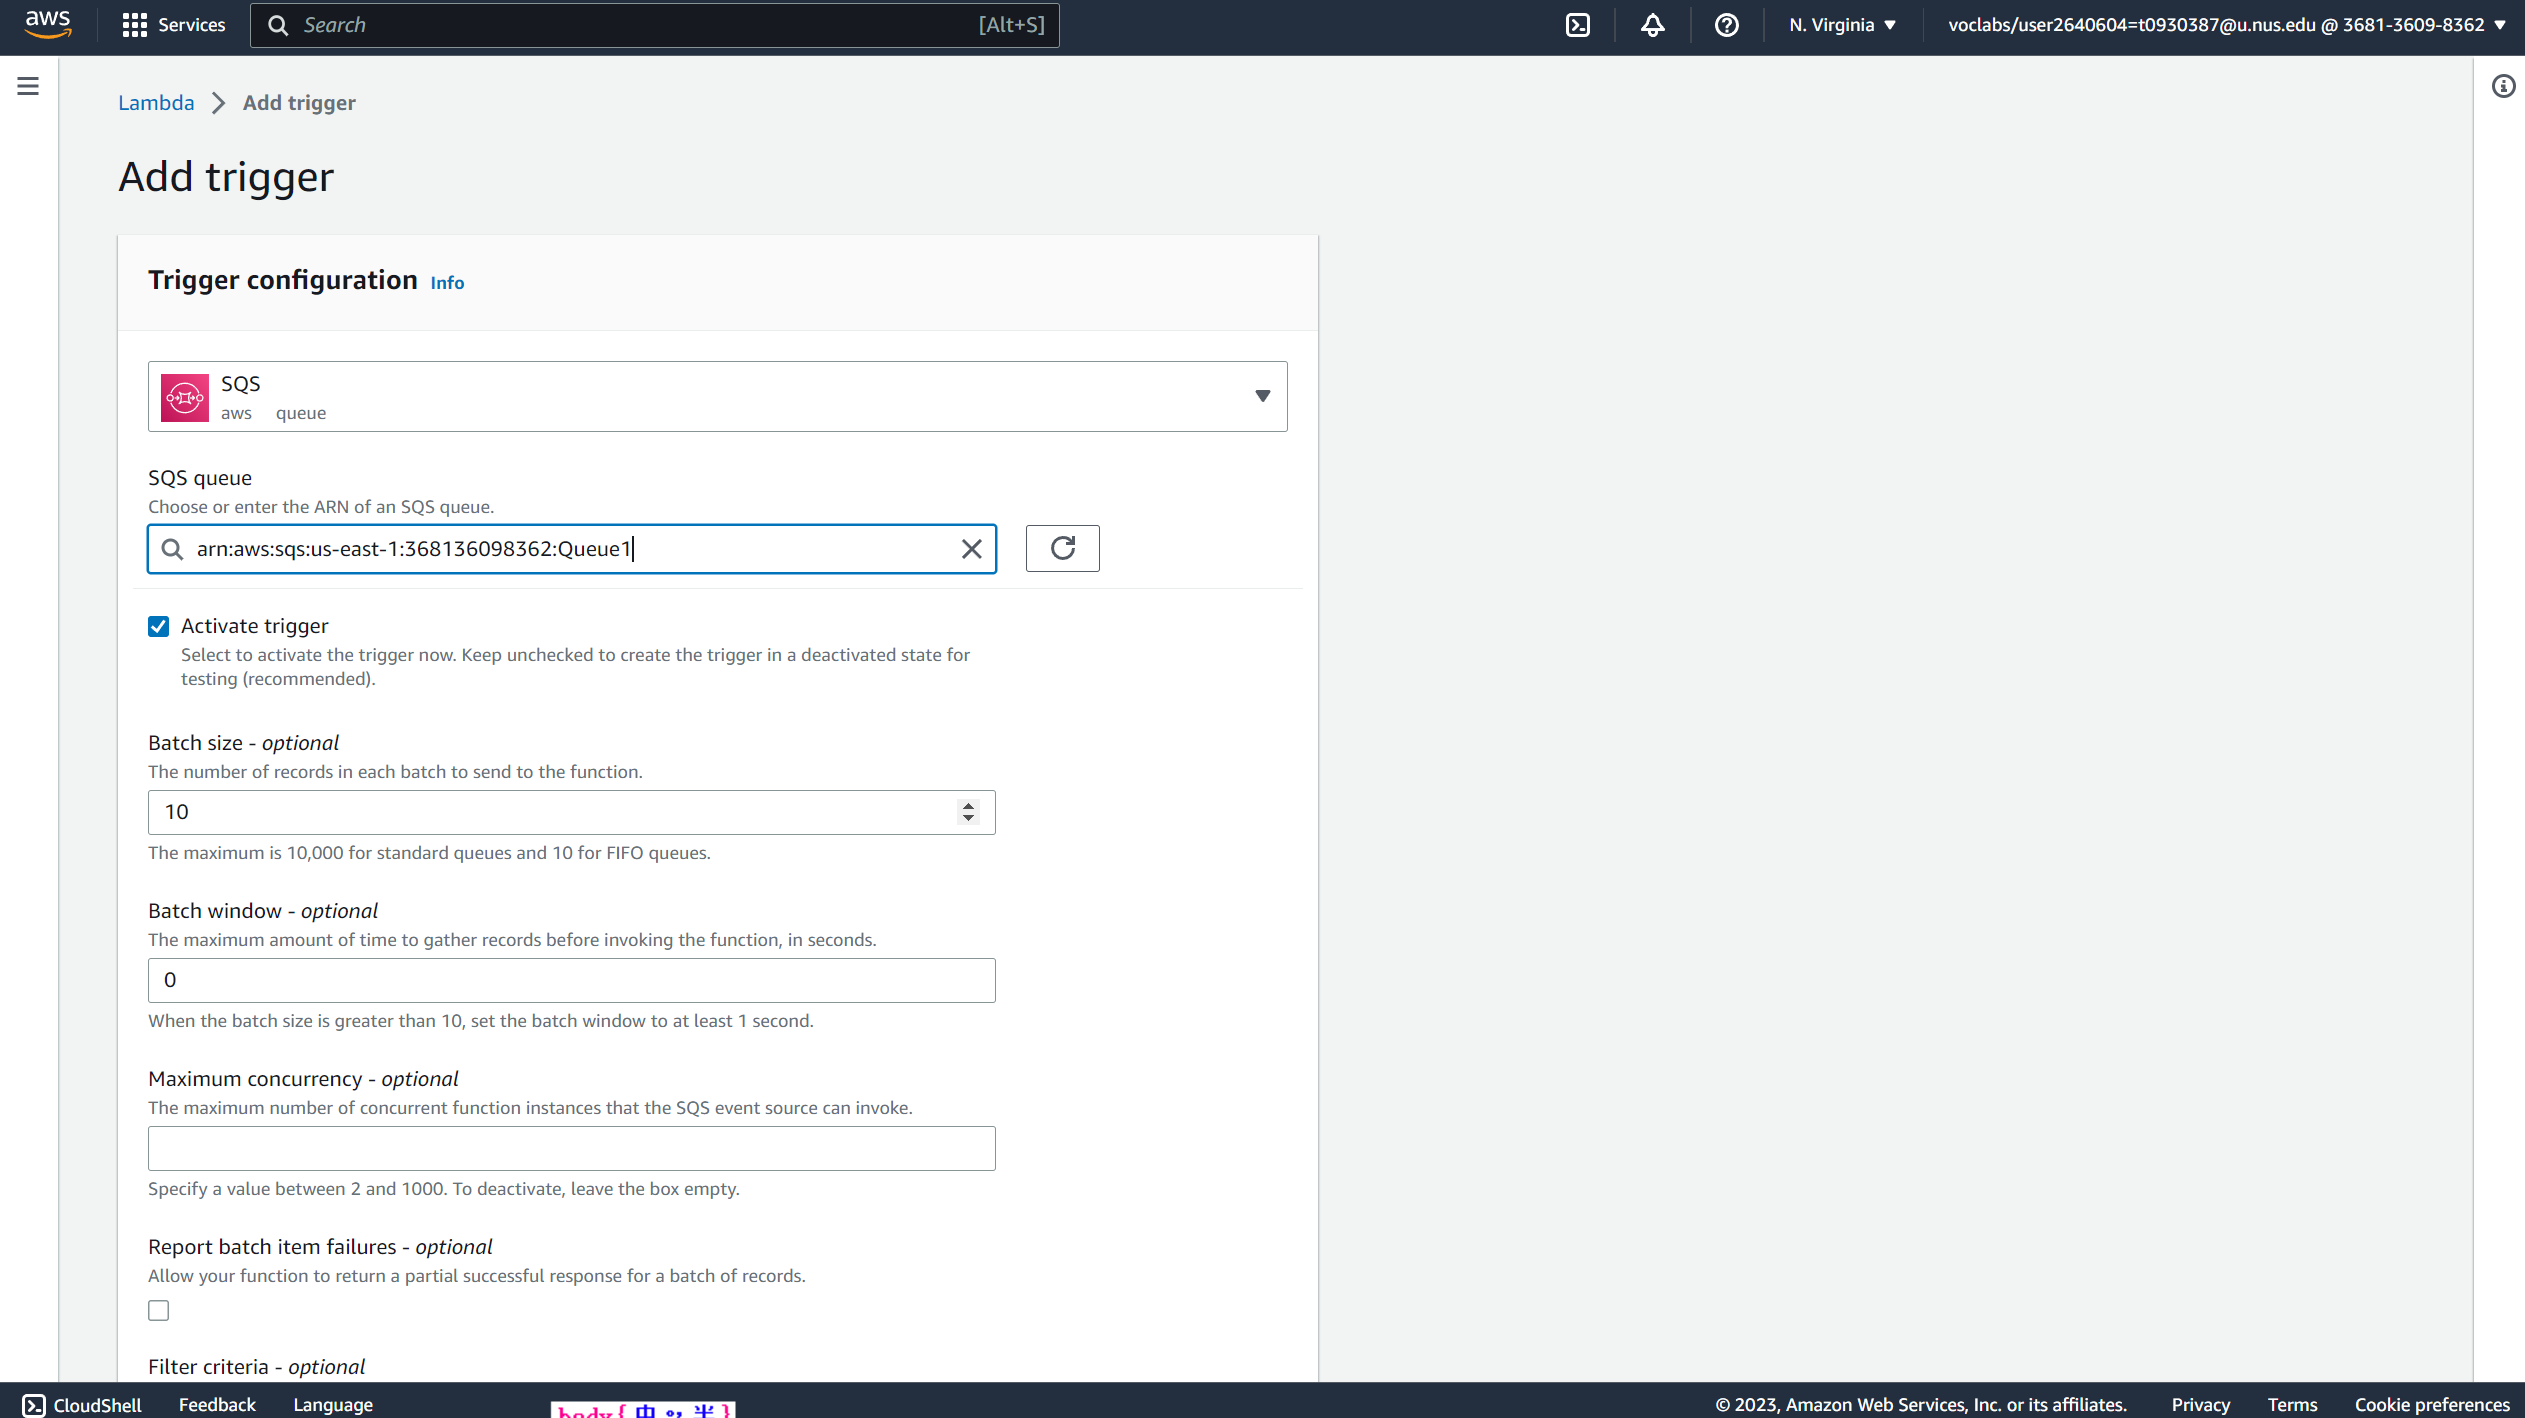
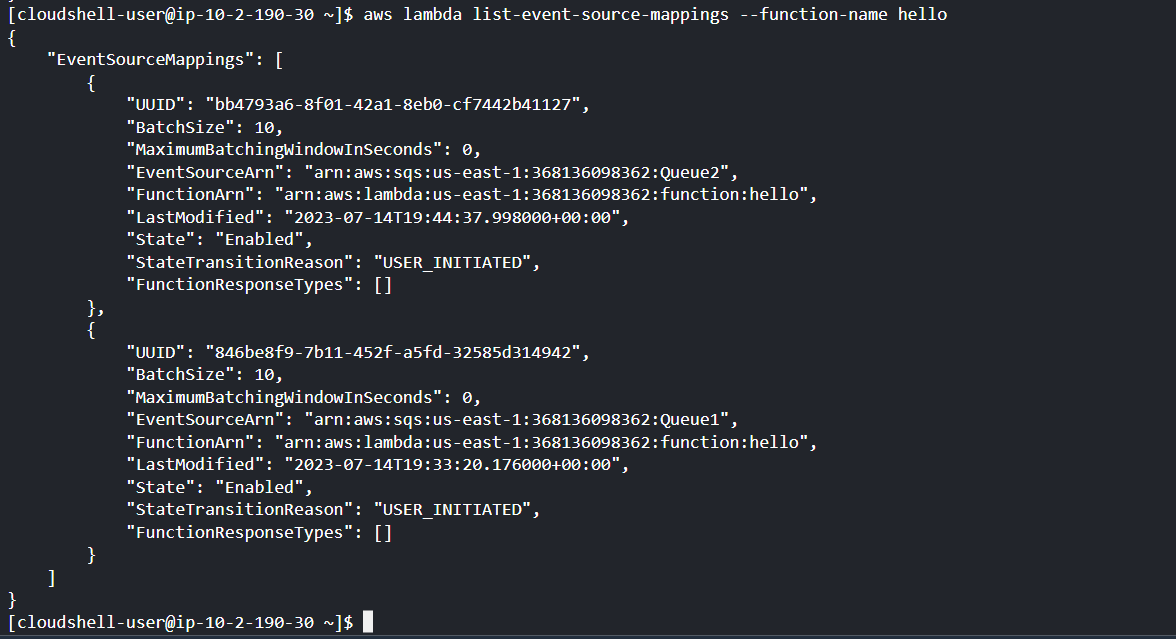
Then we need to add the created queue (identified by its ARN) as trigger for the Lambda function. There are two ways here:
- The first way is add the trigger in AWS Interface, shown in Figure 14.
- The second way is to use command line interface, shown in Figure 15.
- Two queues are successfully added as trigger, shown in Figure 16.

The Function Overview is shown in Figure 17.
Send and Receive Message
In the SQS dashboard of your queue, click “Send and receive message”, then send a message with the body “Hello from SWS3004!”. Message Group ID and Message deduplication ID can be set to 0. Press “Send message”. Next, go to CloudWatch -> Logs -> Log groups and find the logs for your Lambda function. Click on the relevant log stream (e.g., the latest). There should be a message “Hello from SWS3004!” somewhere in this log stream. Take a screenshot and include it in the report. [2 marks]
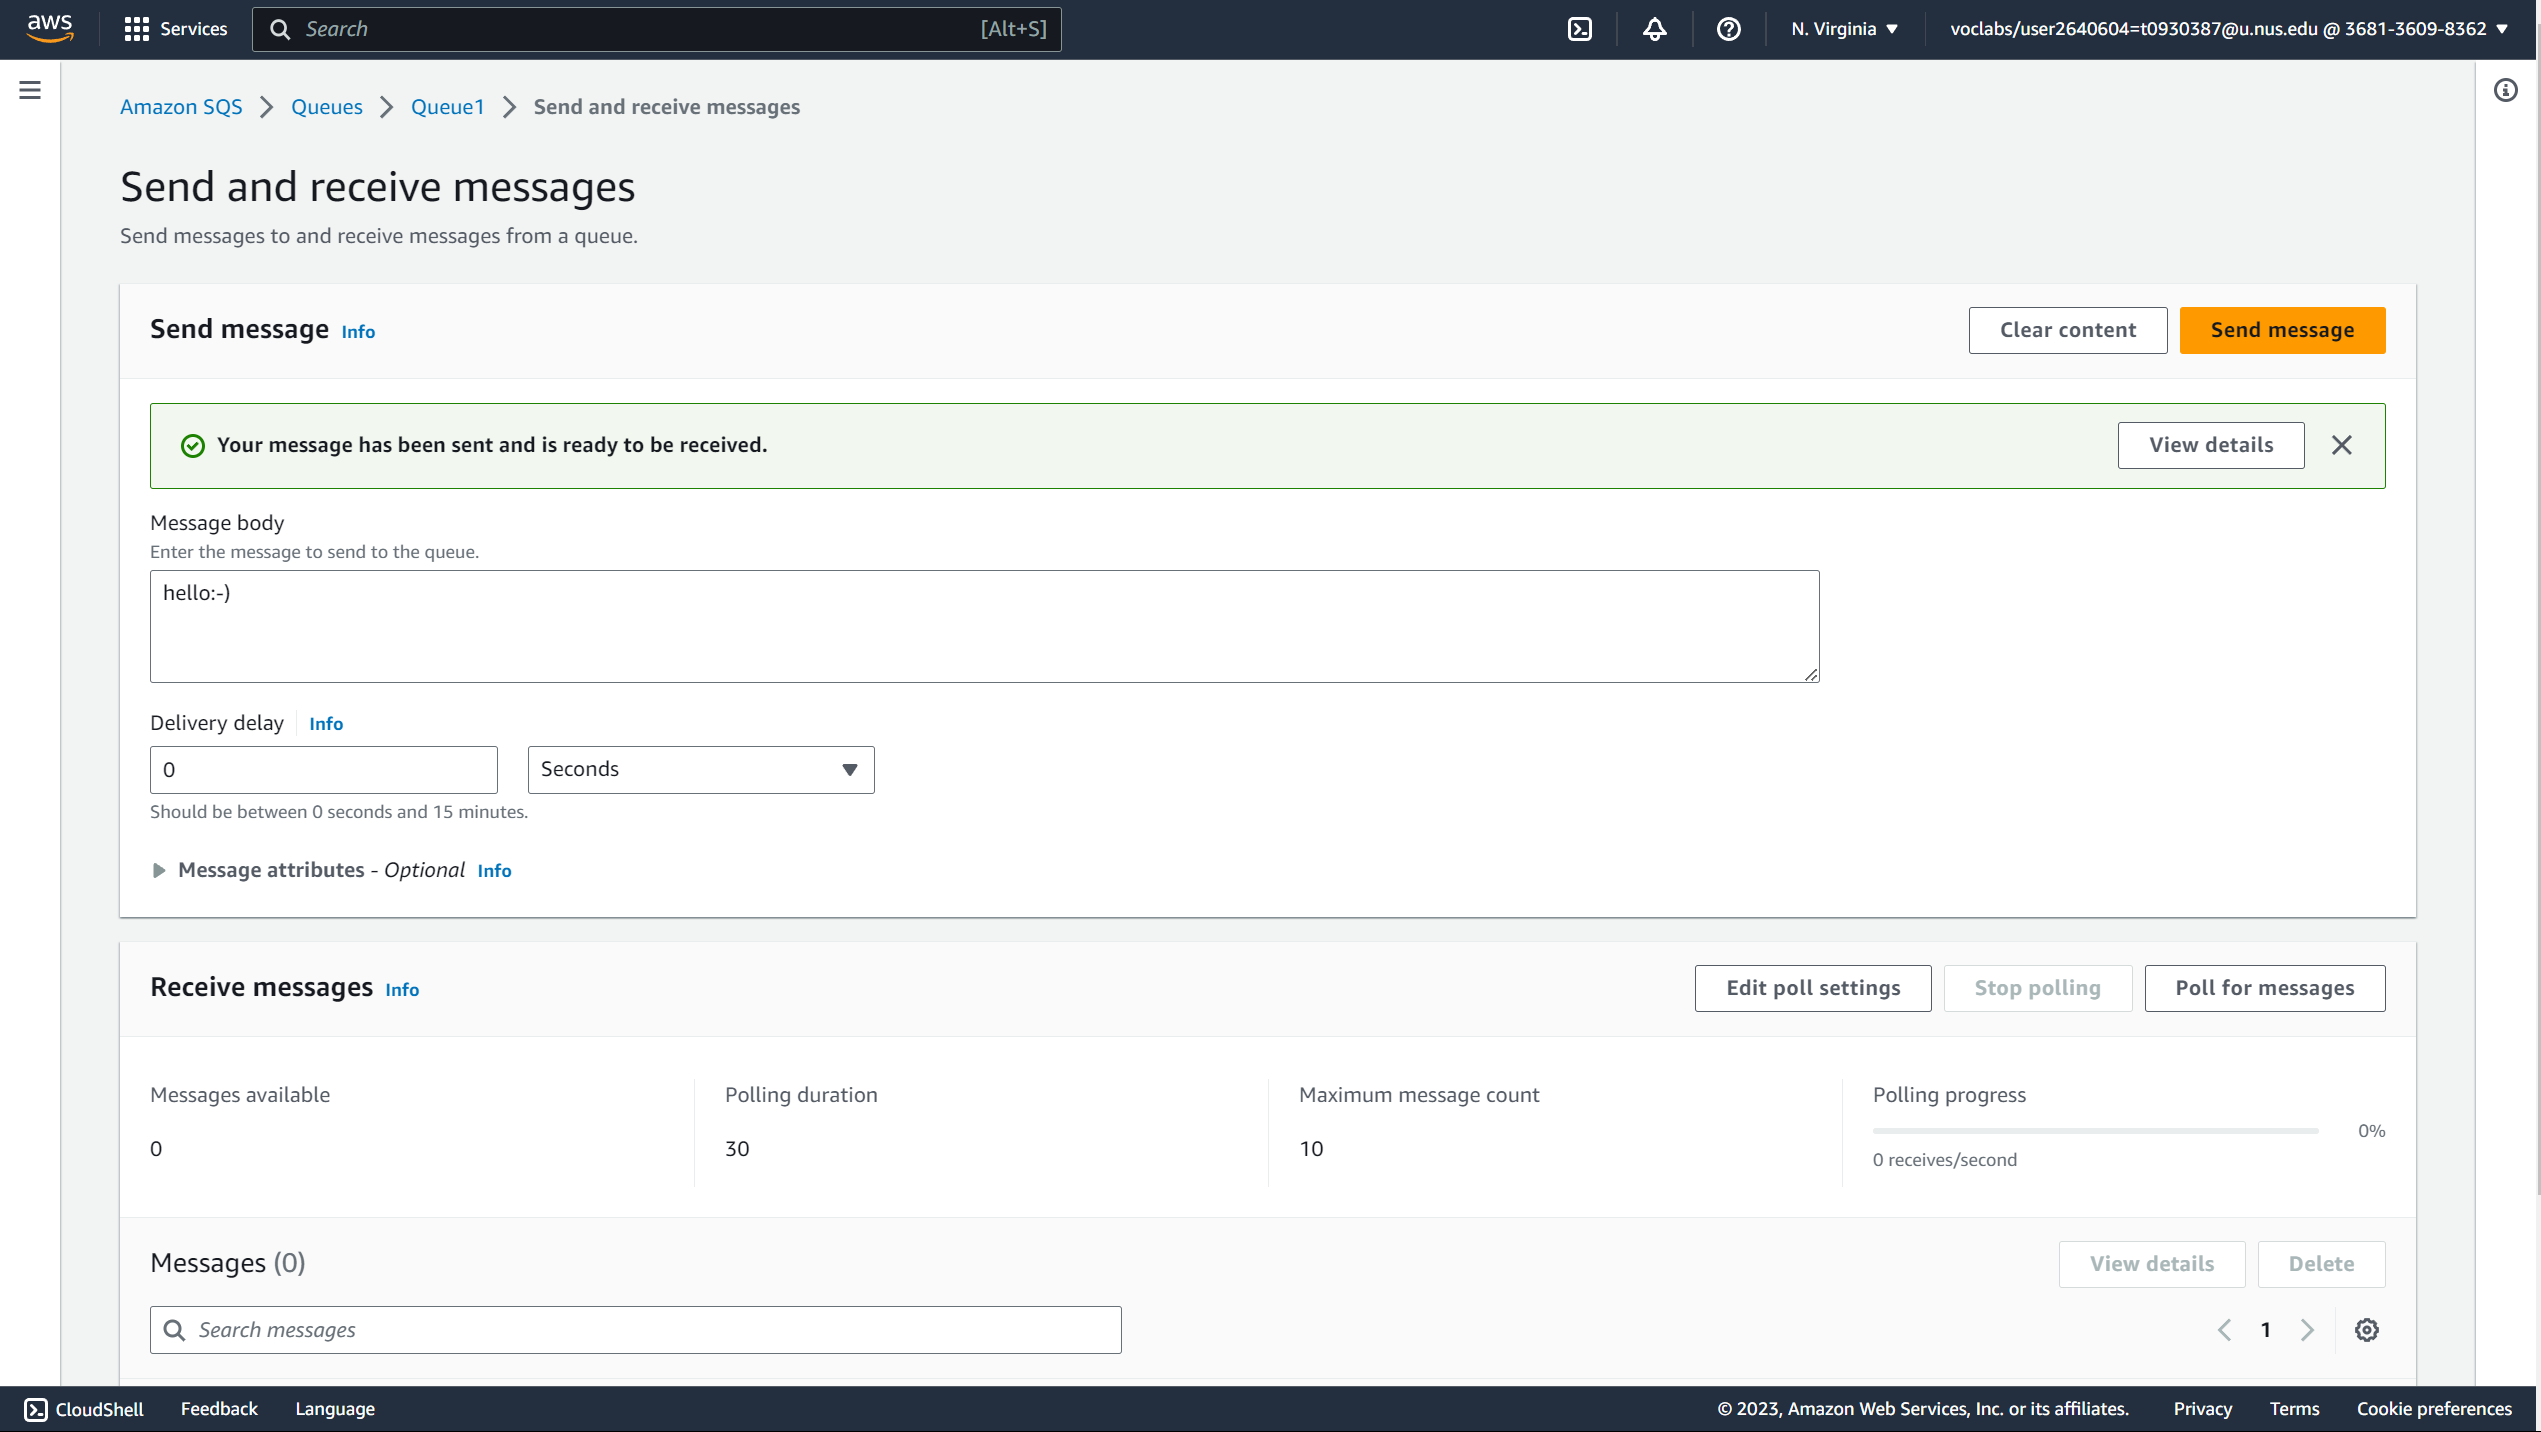
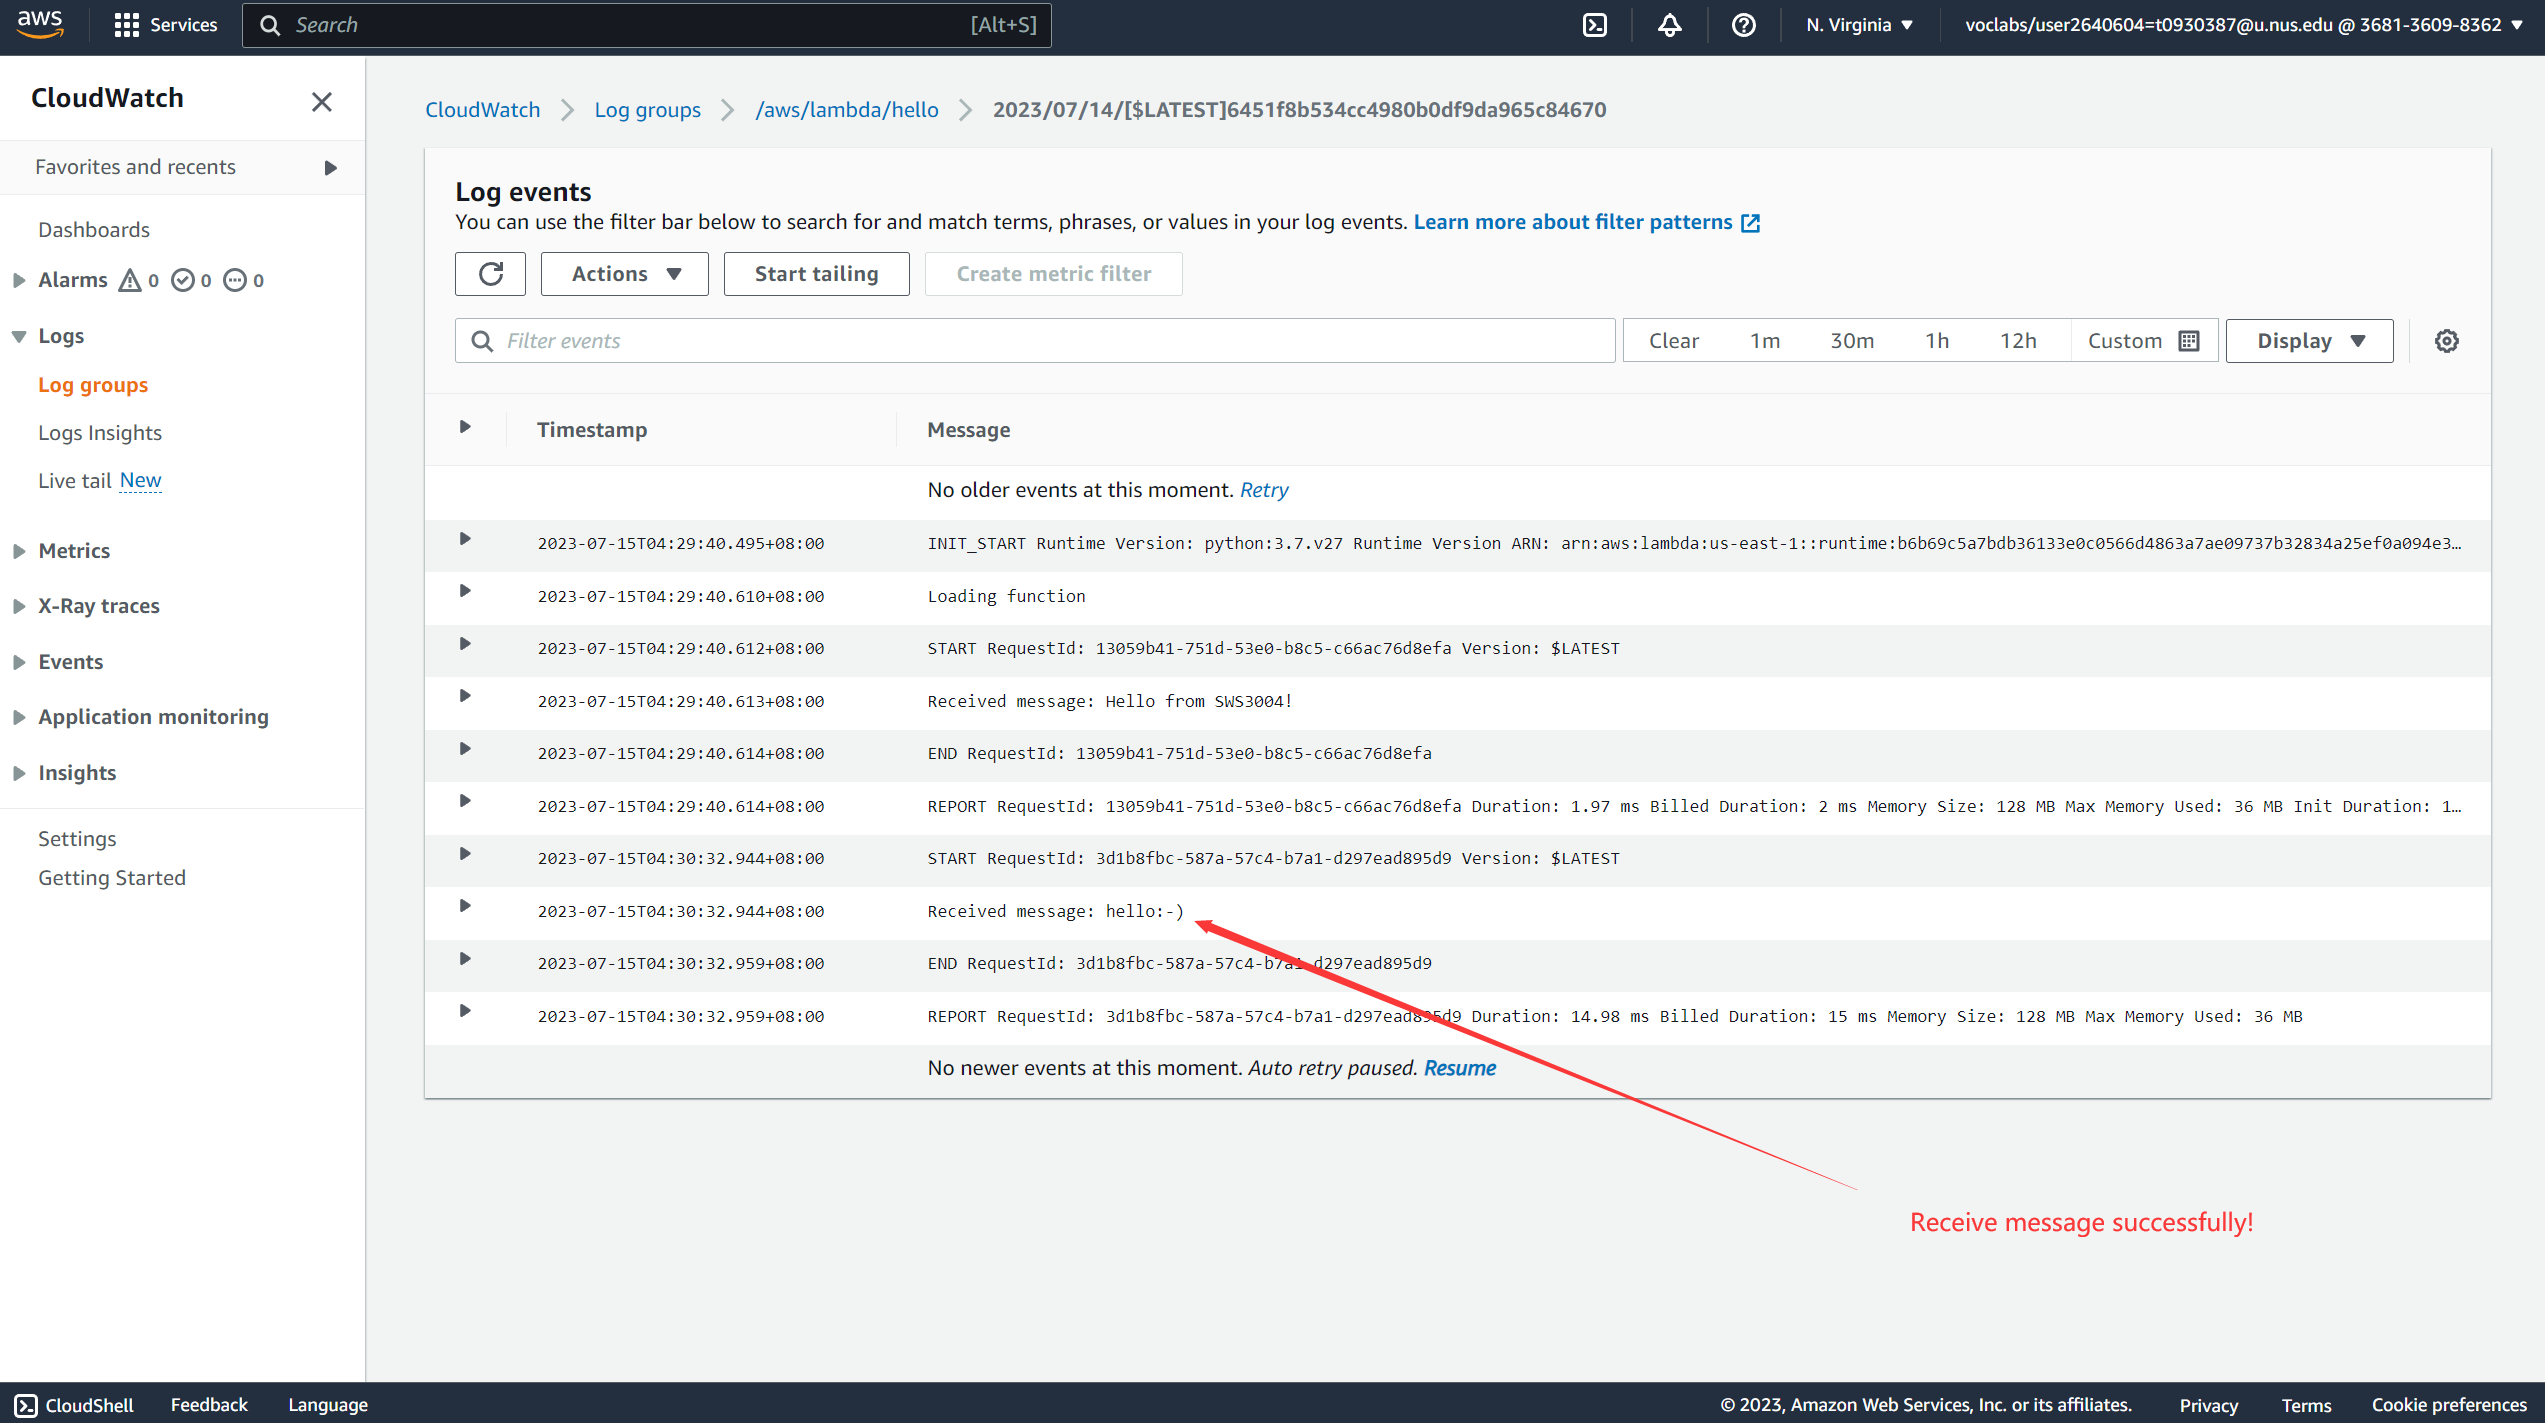
We send a message hello:-) from my SQS queue1, and finds
the logs for my function hello, shown as Figure 18 and Figure 19.
